QUICK START
You've installed the add-in – now what? In just a few steps, we’ll guide you through your first launch, understanding how it works, and basic configuration. Take a moment, and you’ll quickly start using MacroSolid effectively – making the most of its potential.
The demonstration version of the MacroSolid add-in is preconfigured to allow immediate use. However, it’s worth adjusting a few options to suit your individual needs.
SOLIDWORKS® Language Version Matters
If you're using the English version of SOLIDWORKS®, everything should work correctly. However, if you're using a different version, you need to synchronize the language settings in MacroSolid.
In the general options of MacroSolid, check and, if necessary, change the language in three different places. Mixing language versions may cause issues.
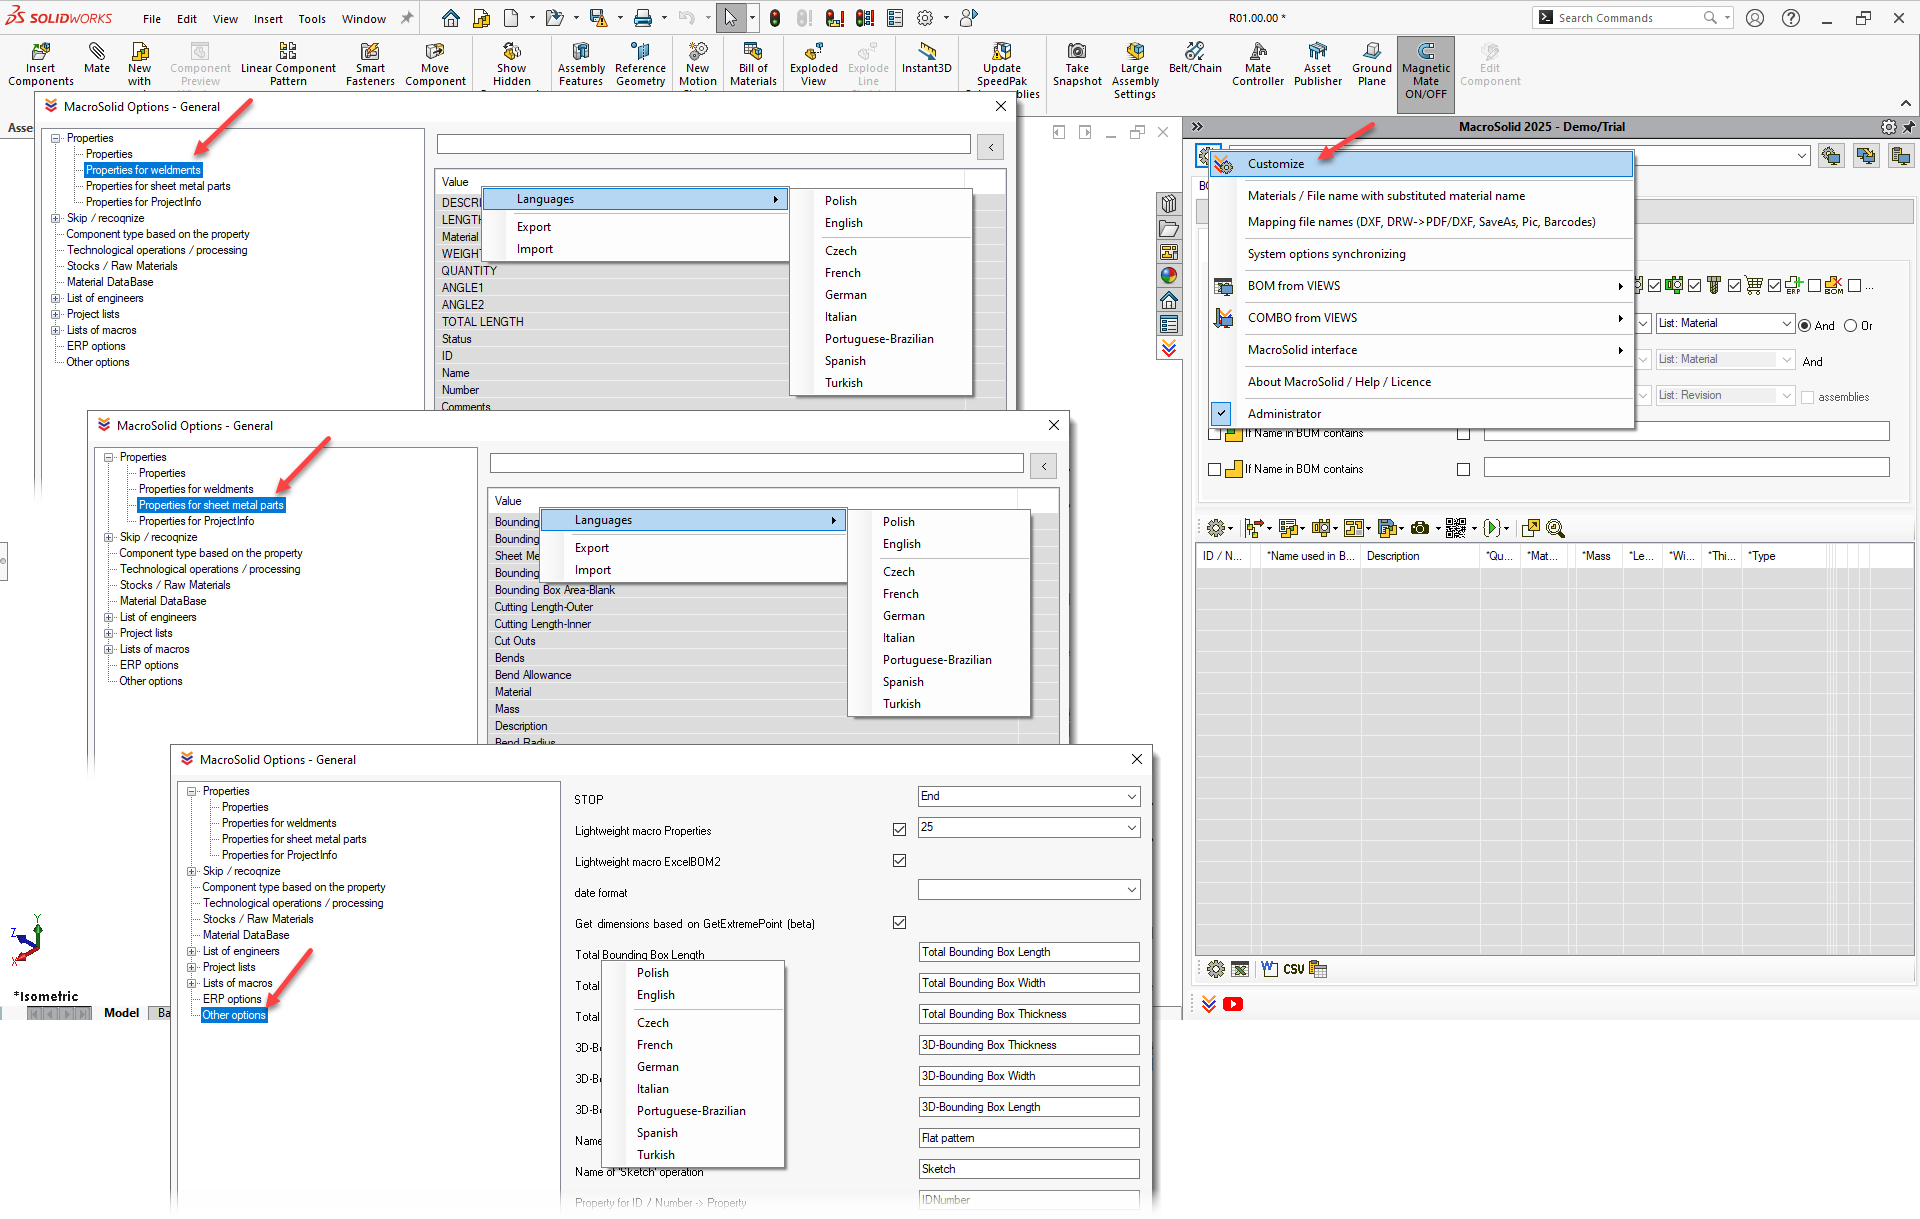
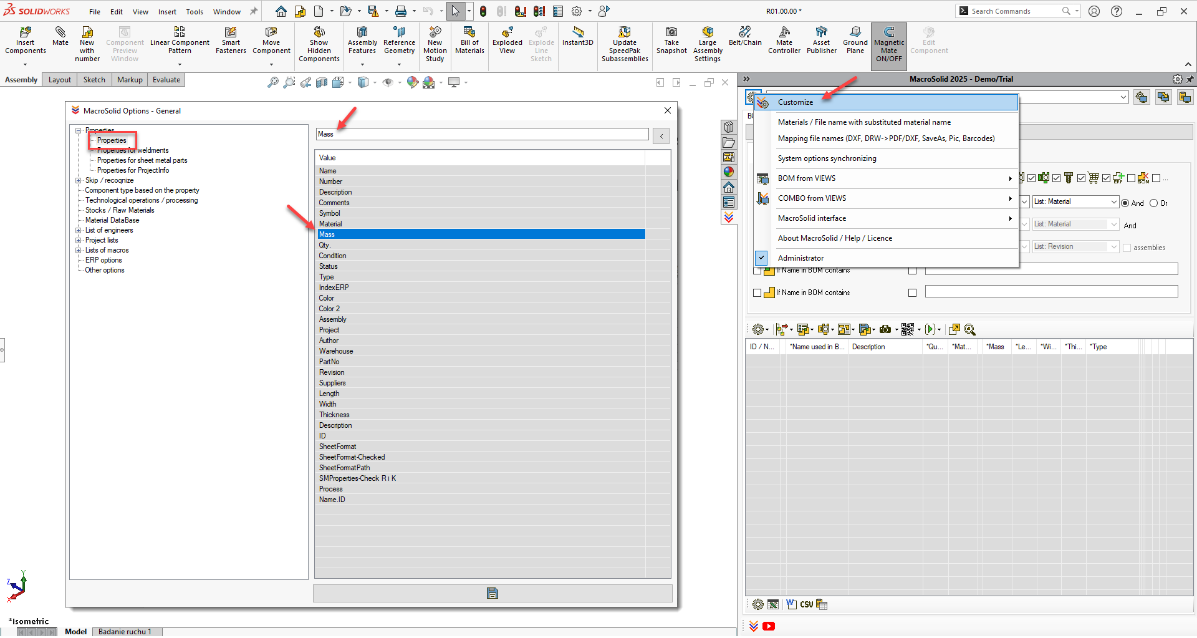
Customizing Property Names
This is a crucial step in the configuration.
Go to: General options → Customize.
On the list of properties, select the appropriate row and change the property name to match the one you use.
For example: instead of the default “Mass” enter “Weight”, instead of “Qty.” enter “Quantity”, etc.
⚠️ Don’t change the order of the list unless necessary – the order also matters.
Managing Purchased Component Library
In General Options, specify paths for:
- standard parts,
- commercial components.
MacroSolid uses these paths to identify component types.
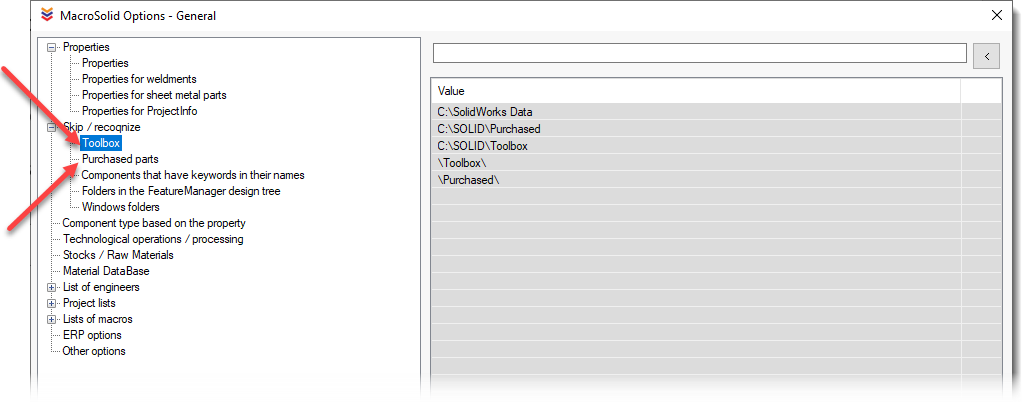
You can also define a file property to identify such components → go to the "Component type based on the property" tab.
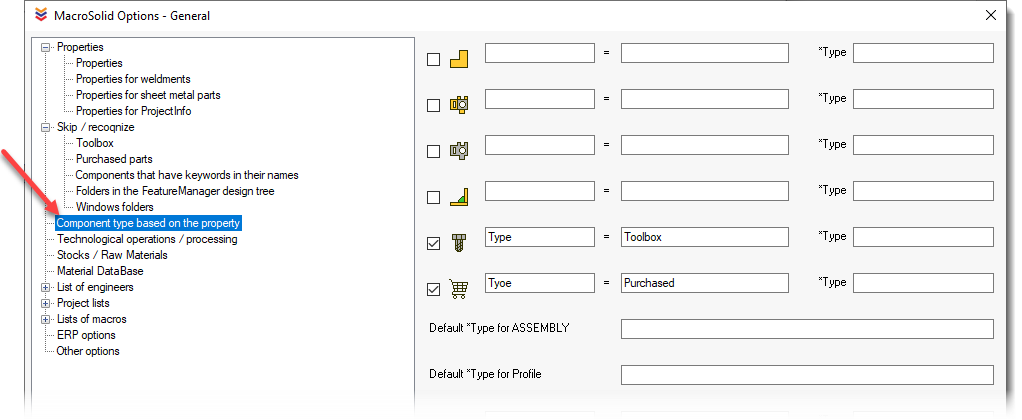
🧰 Toolbox files are automatically recognized as standard parts.
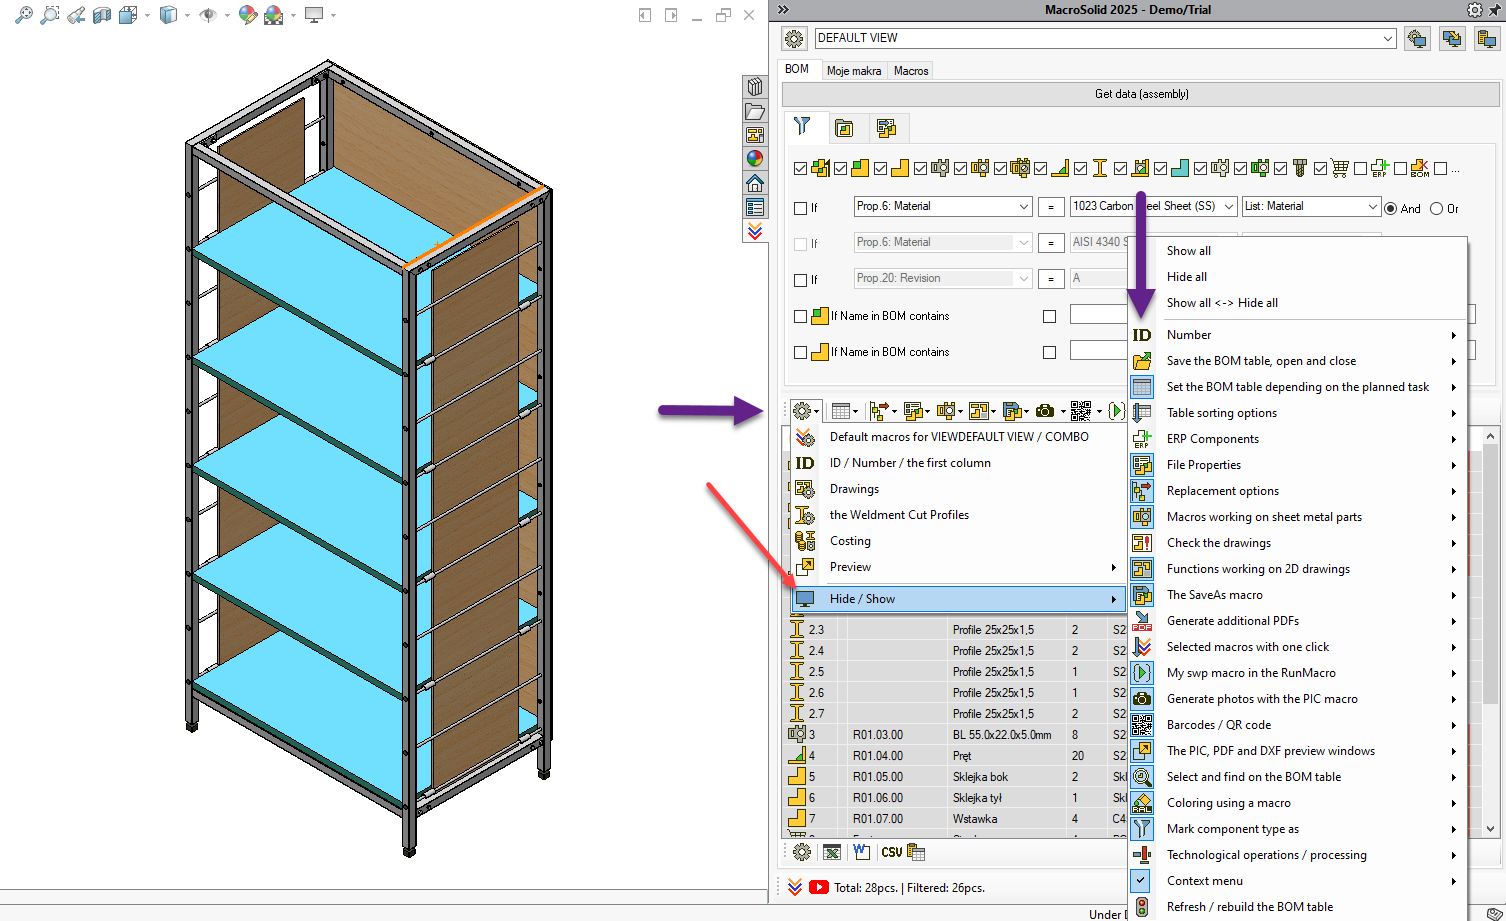
First Launch – BOM Tab
We recommend starting with the BOM tab:
- Get data from the model.
- Filter components.
- Run selected macros.
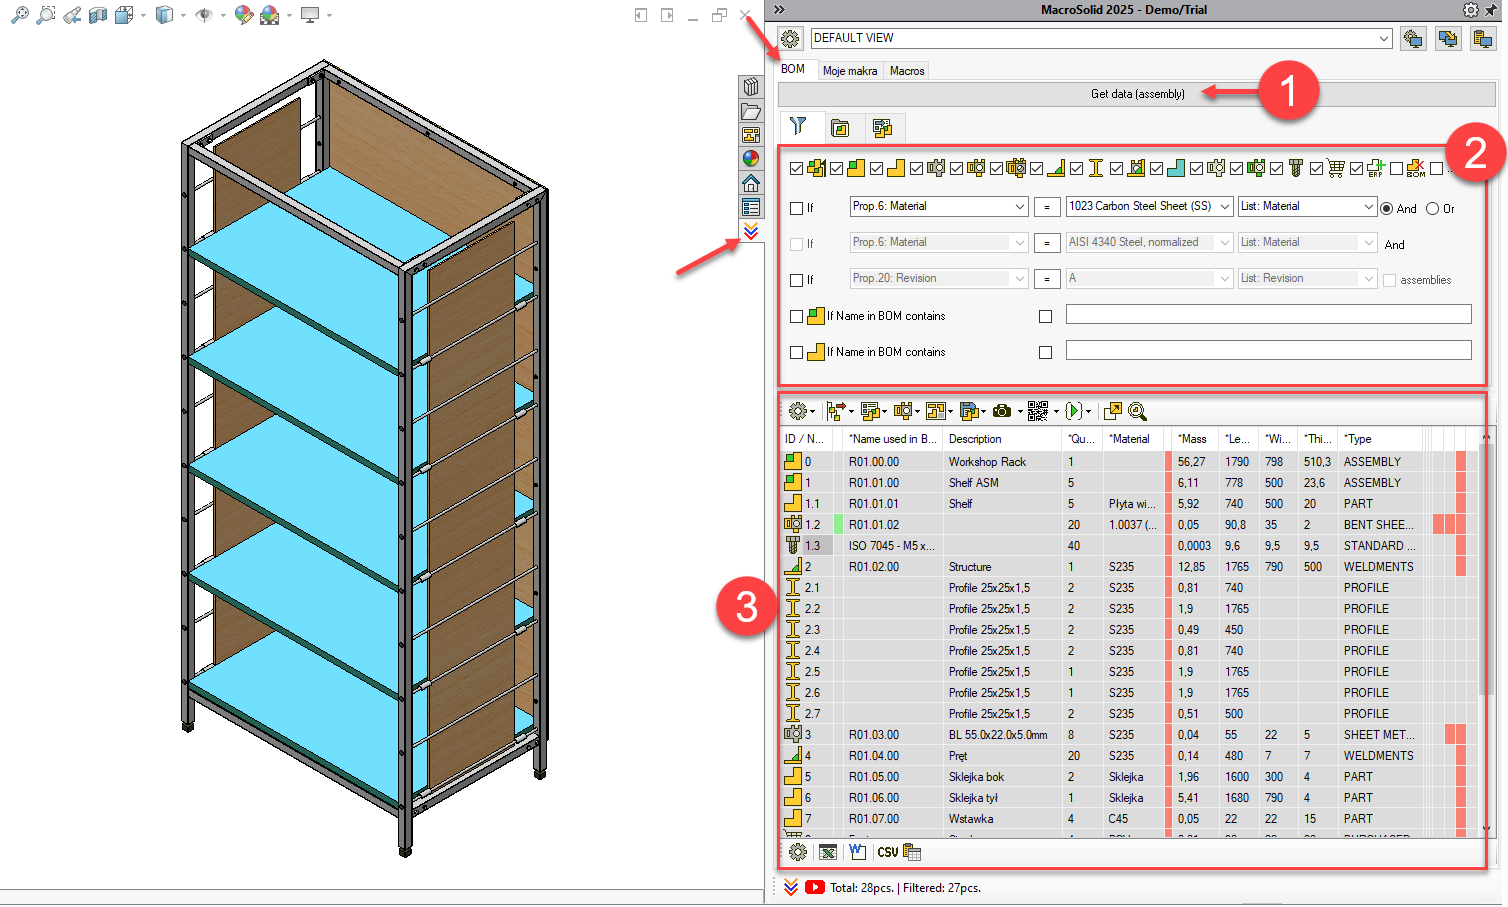
Go through filtering by component type. The BOM table will show only those that meet the criteria.

If you don’t see the filtering panel ![]() – right-click under the "Get data" button and enable the panel.
– right-click under the "Get data" button and enable the panel.
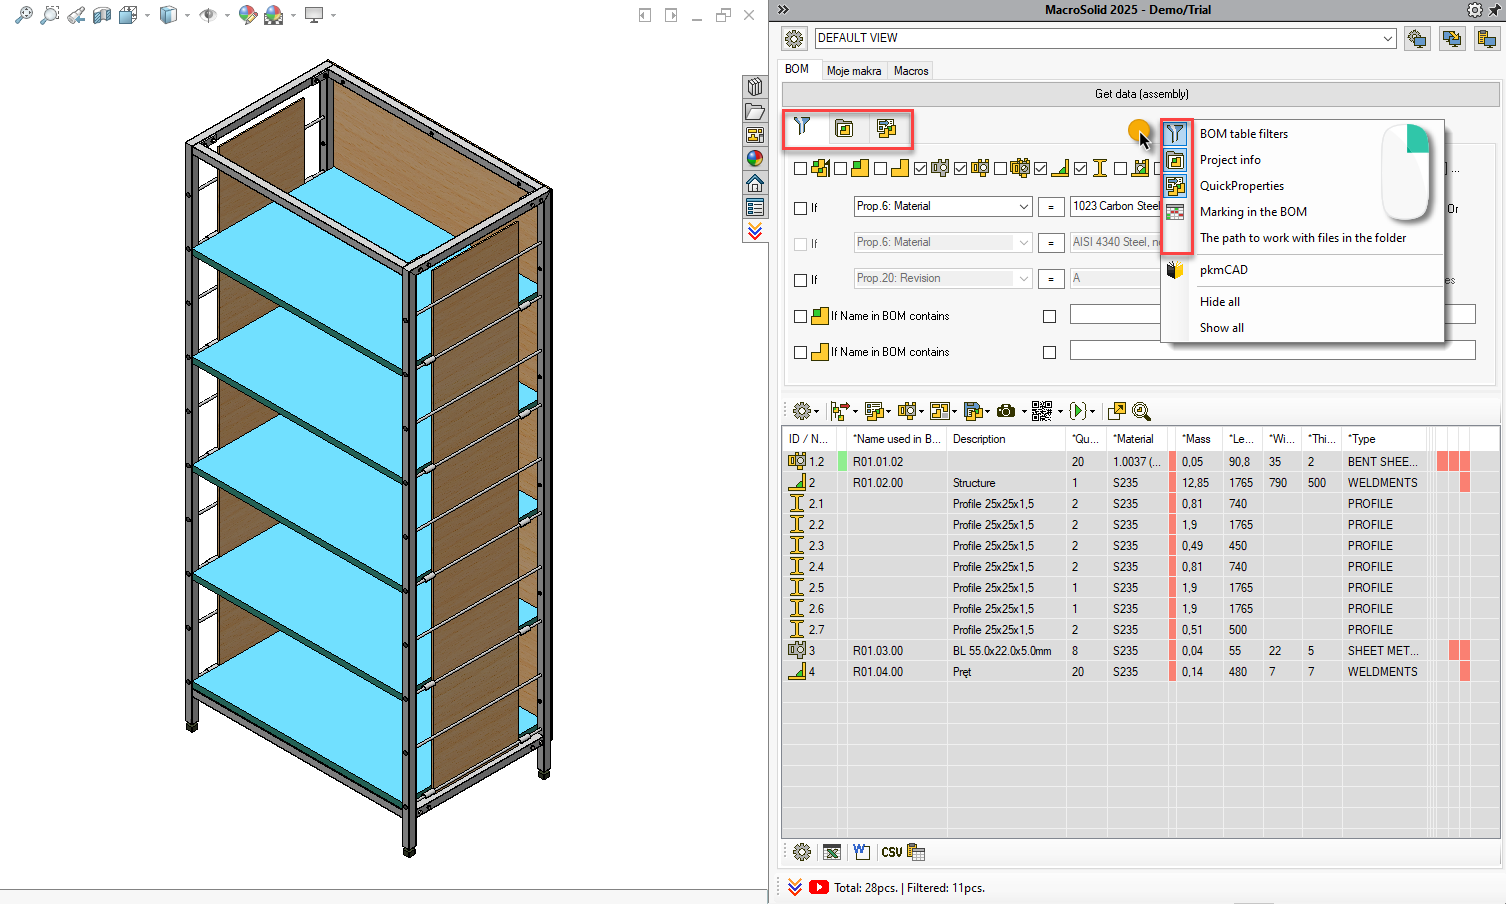
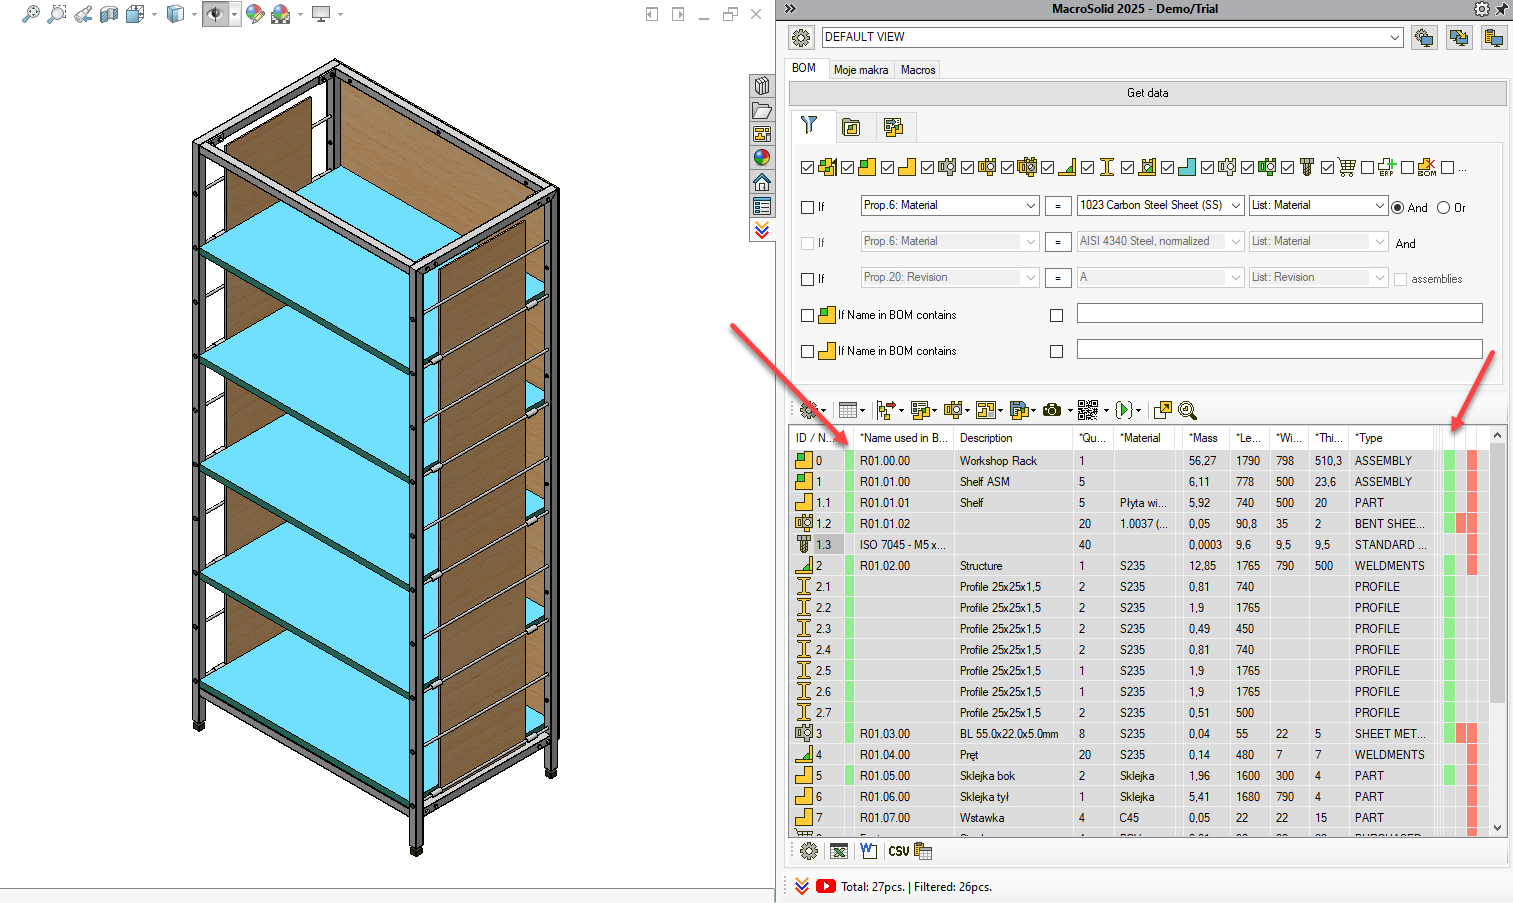
Customizing the BOM Table
At this stage, don’t make any changes to the BOM Table.
It is preset to provide immediate access to the most commonly used functions.
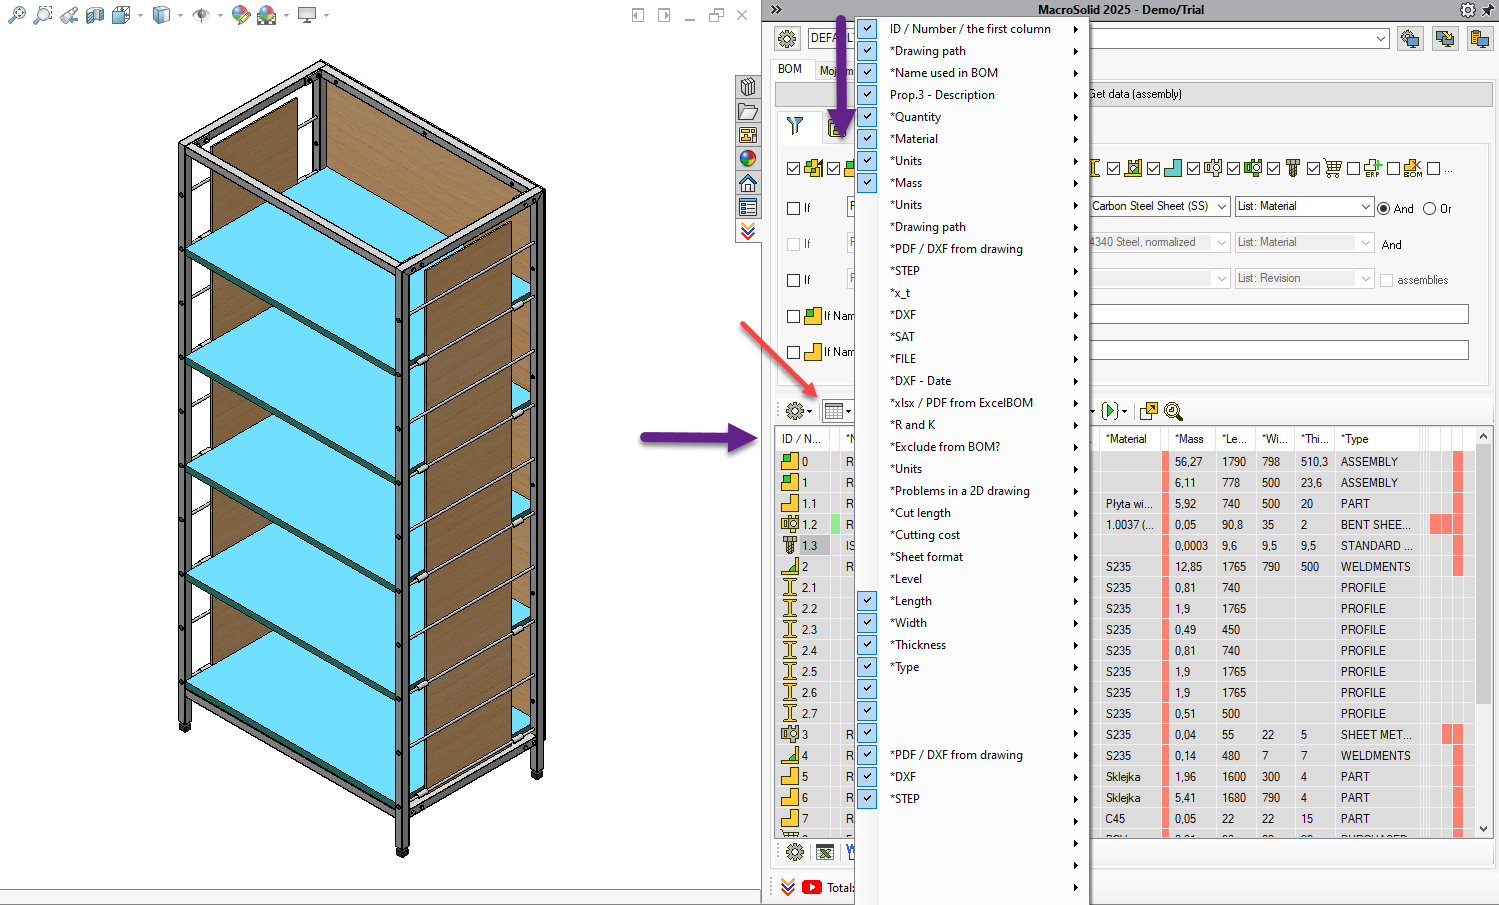
🔧 You can hide/show tools – but initially, do not change the configuration. 😉
First Macro Launch – UnitsSystem 
- Go to the Macros tab and click UnitsSystem.
- Set the units, save, and
- click Cancel.
- Return to the BOM tab and get the data.
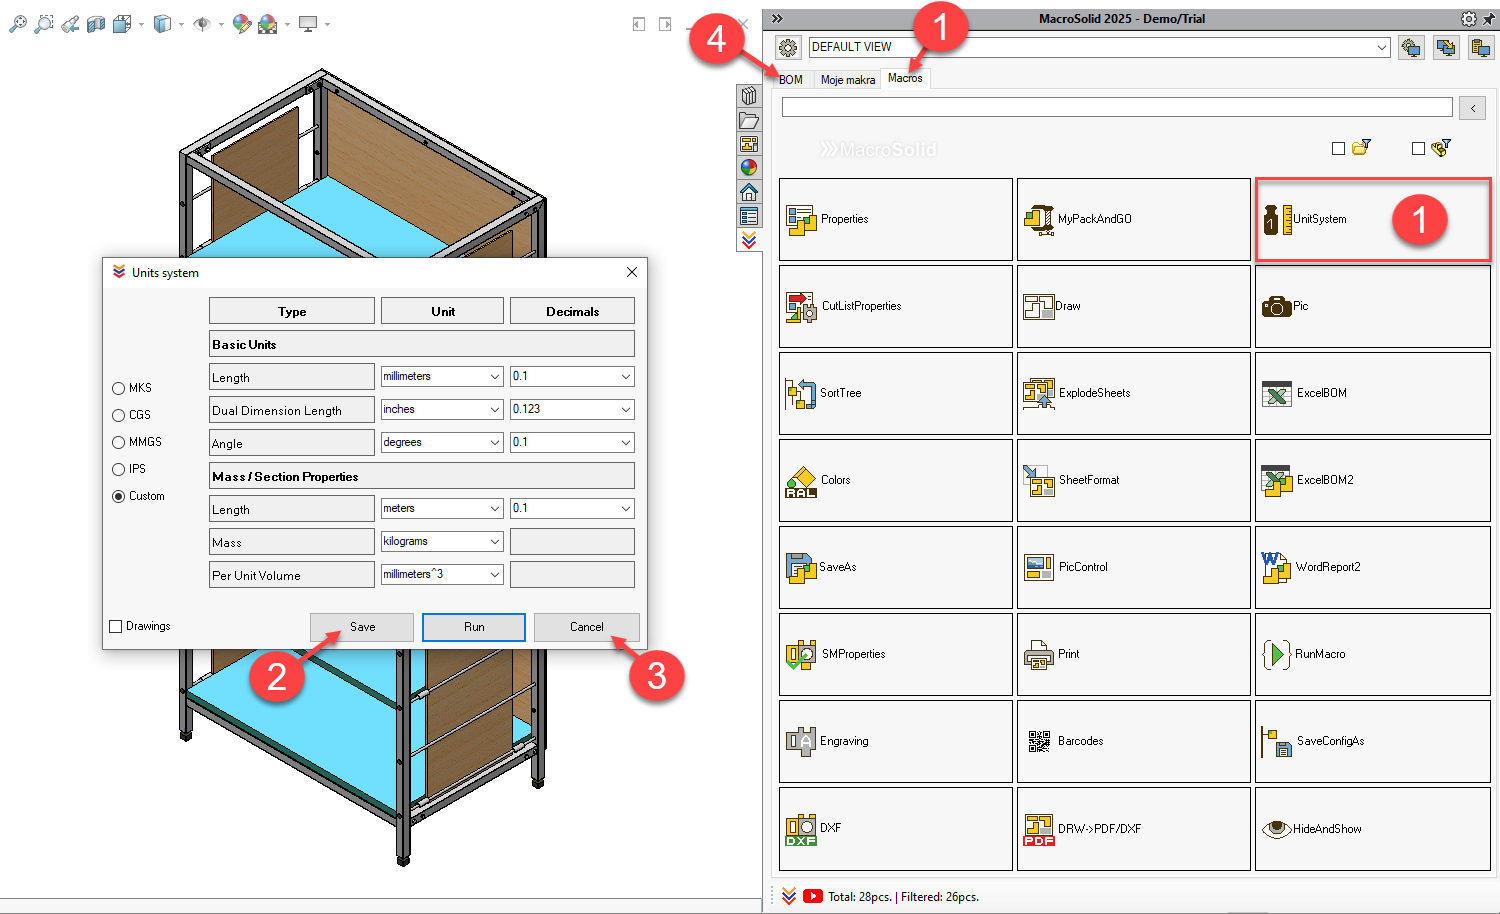
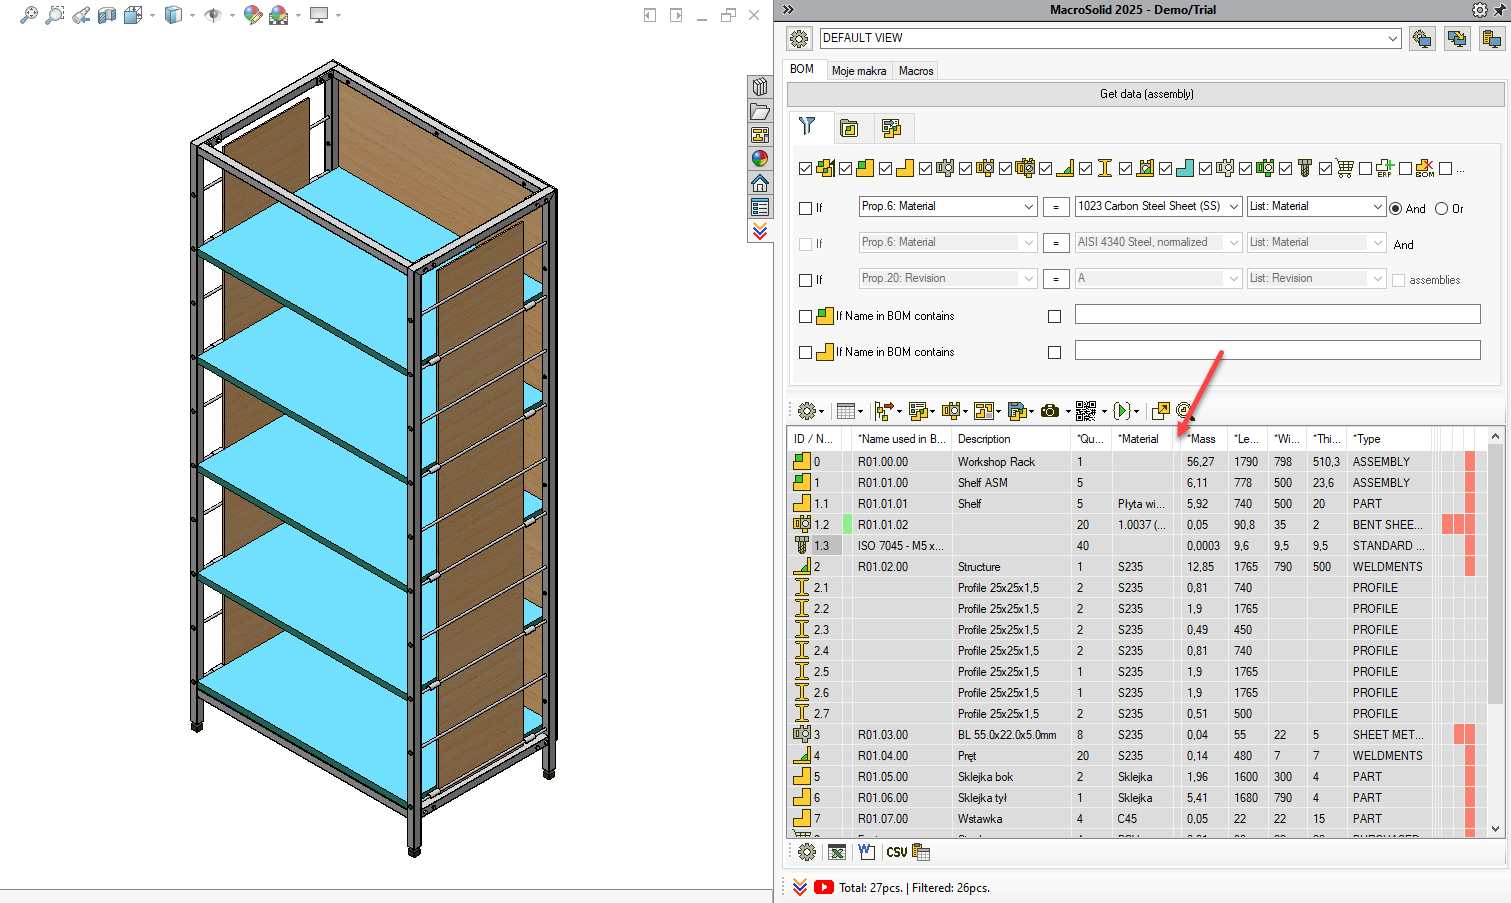
The BOM table will highlight components with units different than the set ones.
⚠️ Run the UnitsSystem macro from the button above the BOM table to unify units for all components or select rows and run it only for those – right-click → context menu.
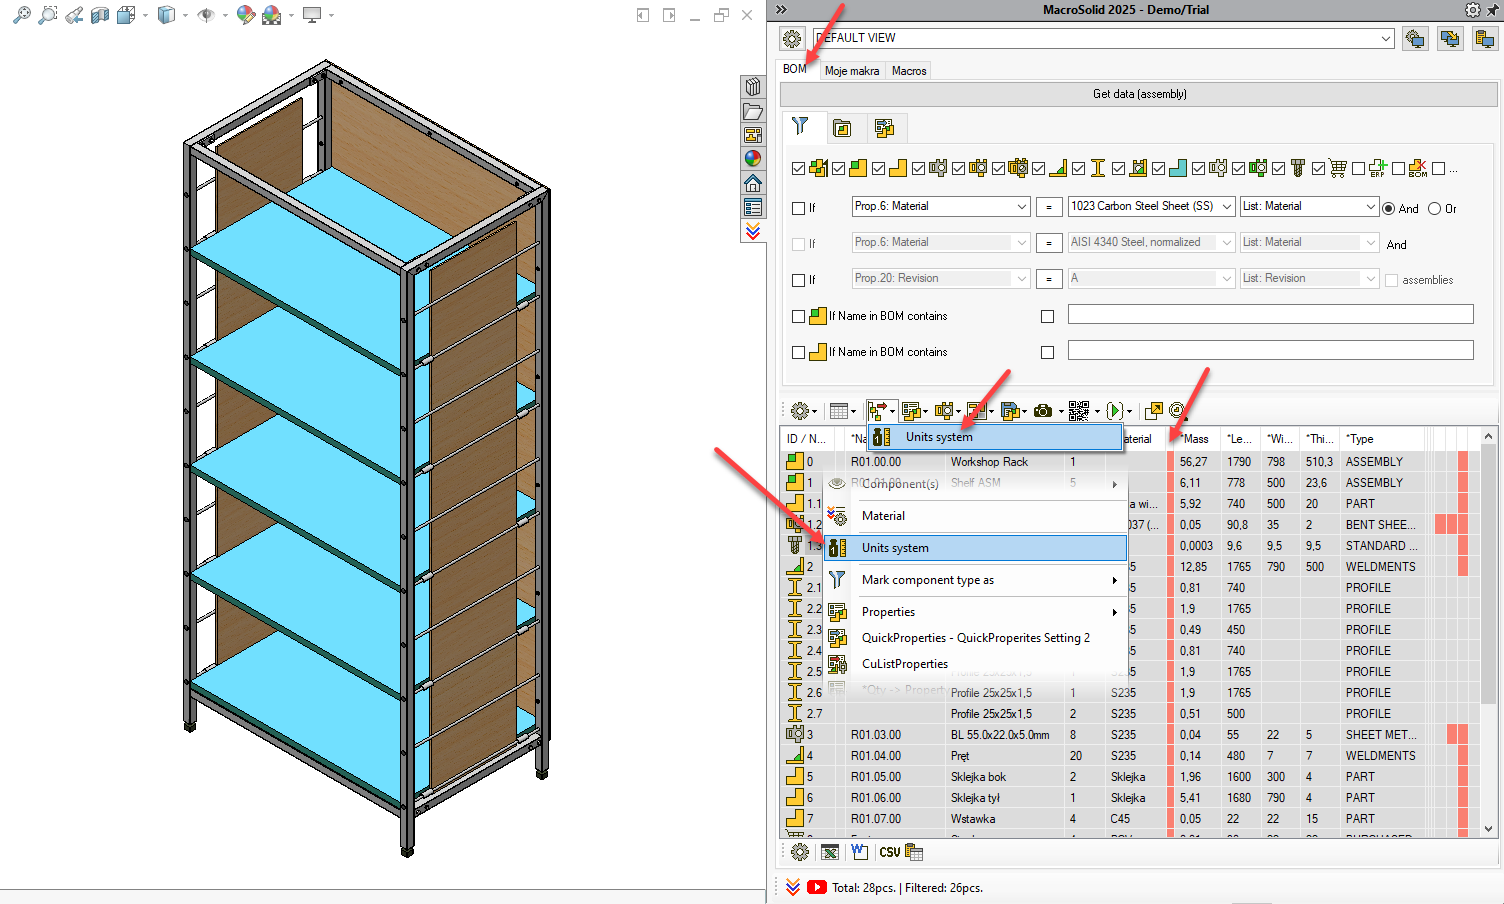
✅ The *Units and *Mass columns will be updated.
Generating PDFs from Drawings 
Click the PDF from Drawings button.
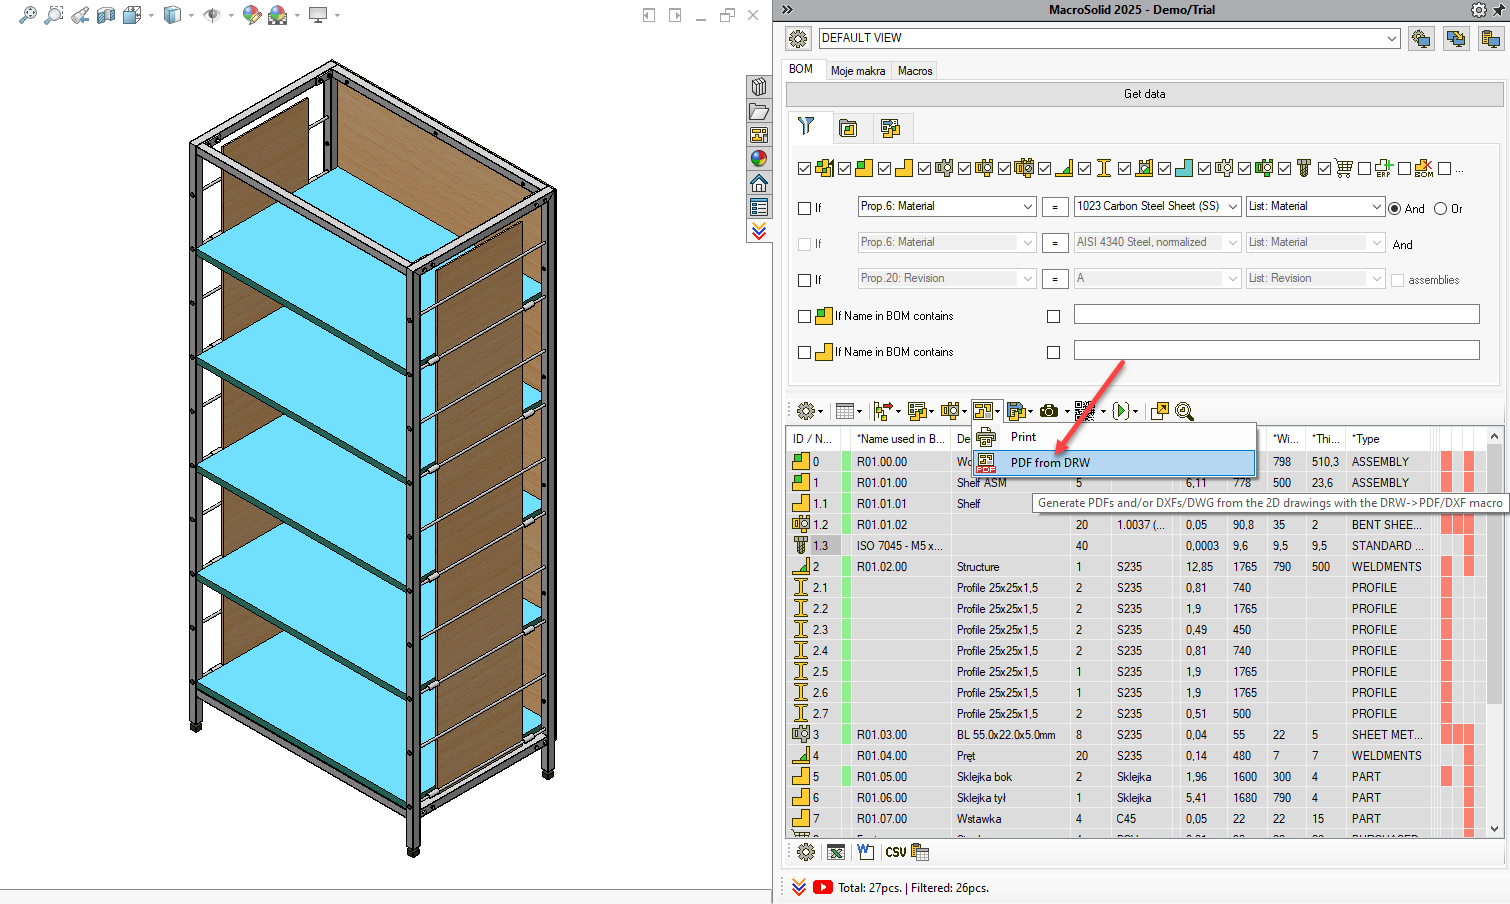
- PDFs will be saved in the /PDF folder at the assembly level.
- The BOM table will show paths to both drawings and PDFs.
- Green = file exists, red = file missing.
From the BOM Table, you can open drawings and PDFs (context menu or clicking on the cell in the path column).
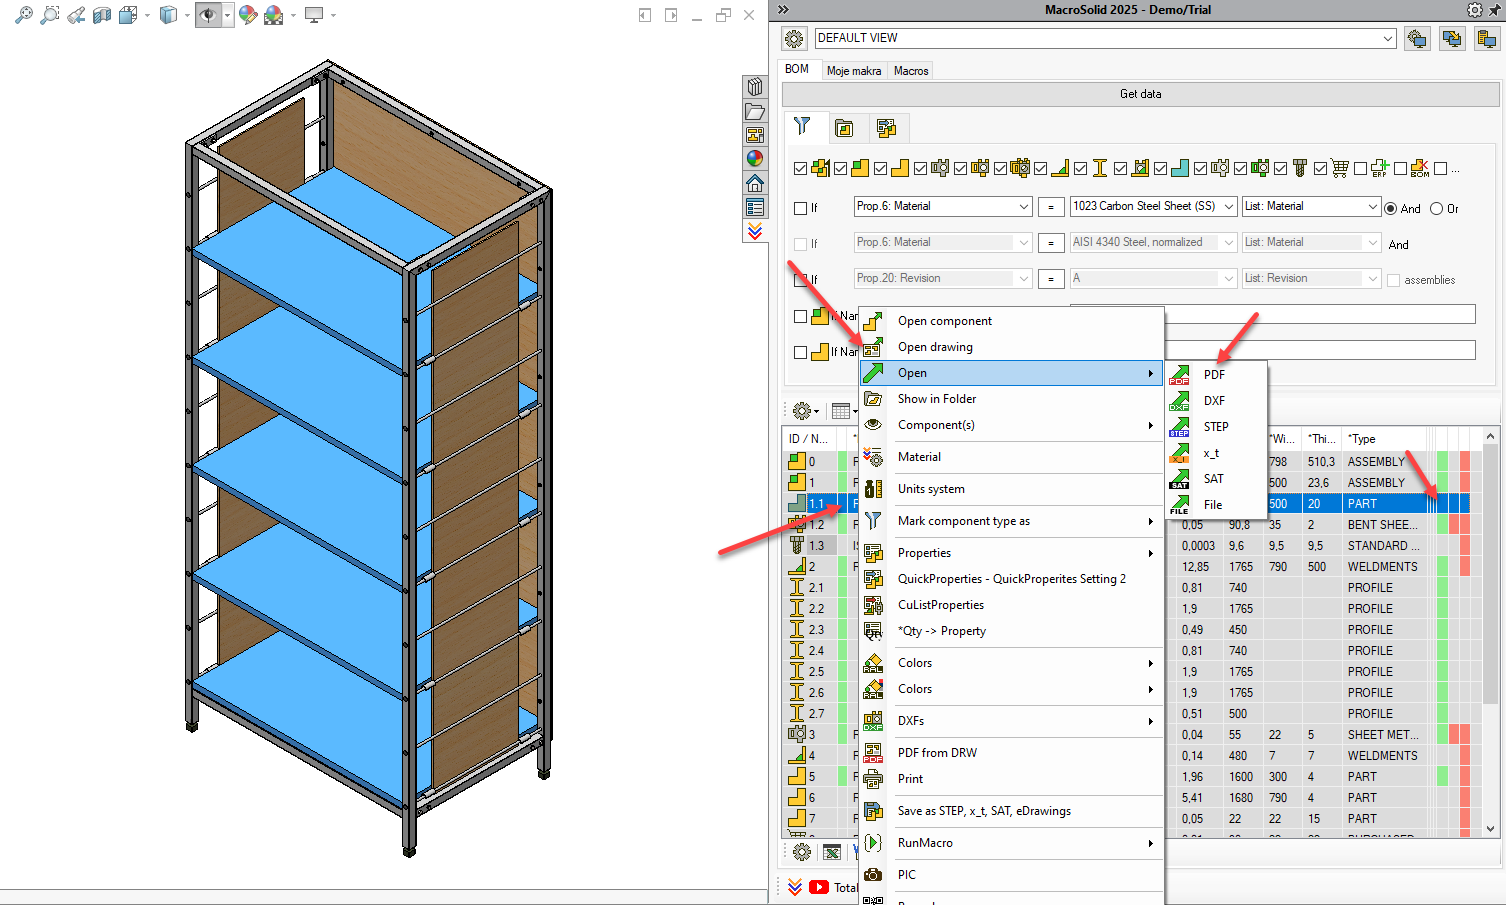
Want to change SLDDRW to PDF conversion settings? Or generate DXF/DWG files along with PDFs? No problem.
- Go to the Macros tab and click DRW→PDF/DXF.
- Adjust the settings, save, and
- click Cancel.
- Return to the BOM tab and generate PDFs.
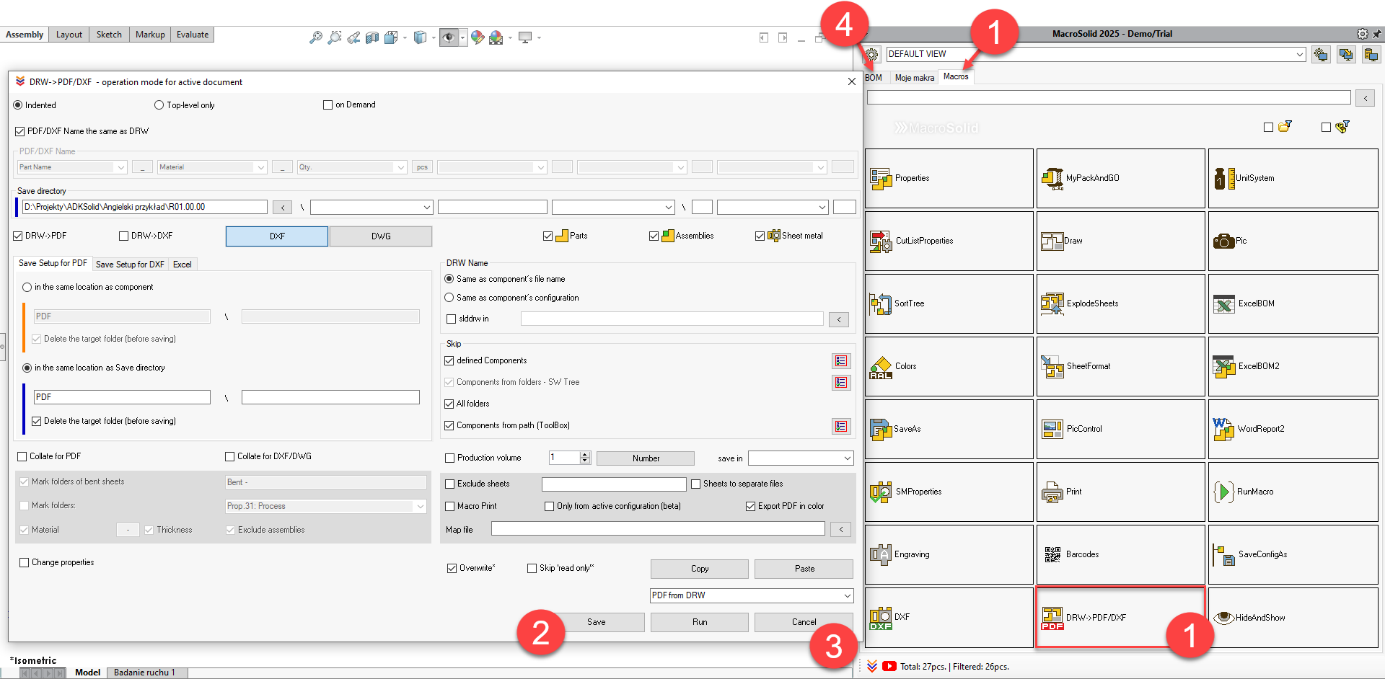
This process applies to all other MacroSolid functions – configure the macro, save settings → use in the BOM tab, in the BOM Table.
Generating DXF from Sheet Metal 
Same procedure – go to the DXF macro In the Macros tab, adjust settings, save and use from the BOM tab.
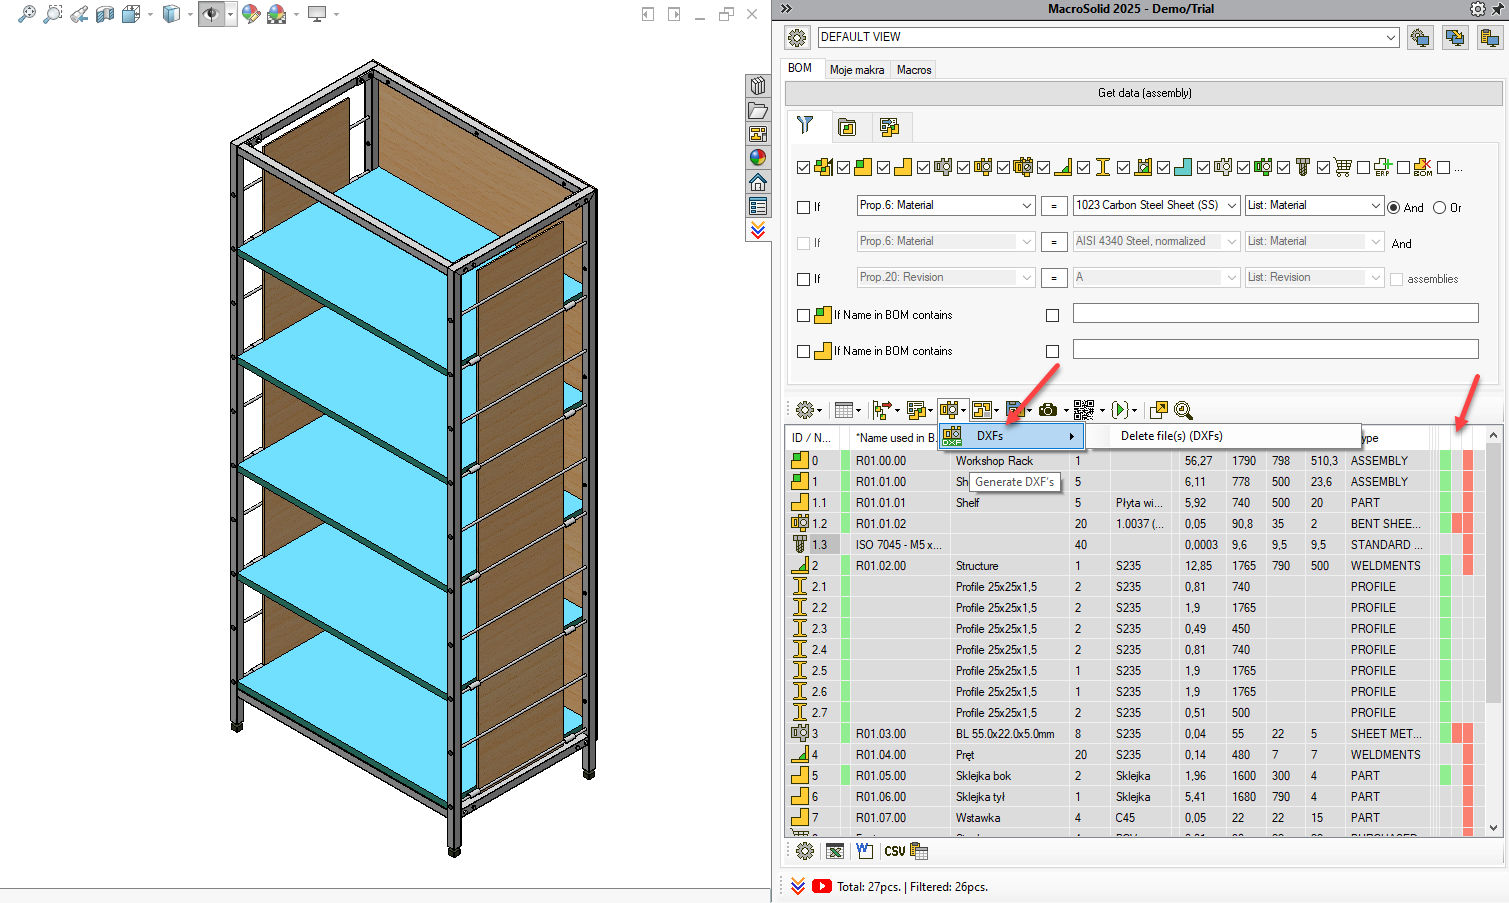
If you're using multibody modeling and your sheet metal parts might also be located within a weldment file, the procedure will be slightly different. The DXF macro can handle it. Let us know, and we’ll send you additional instructions.
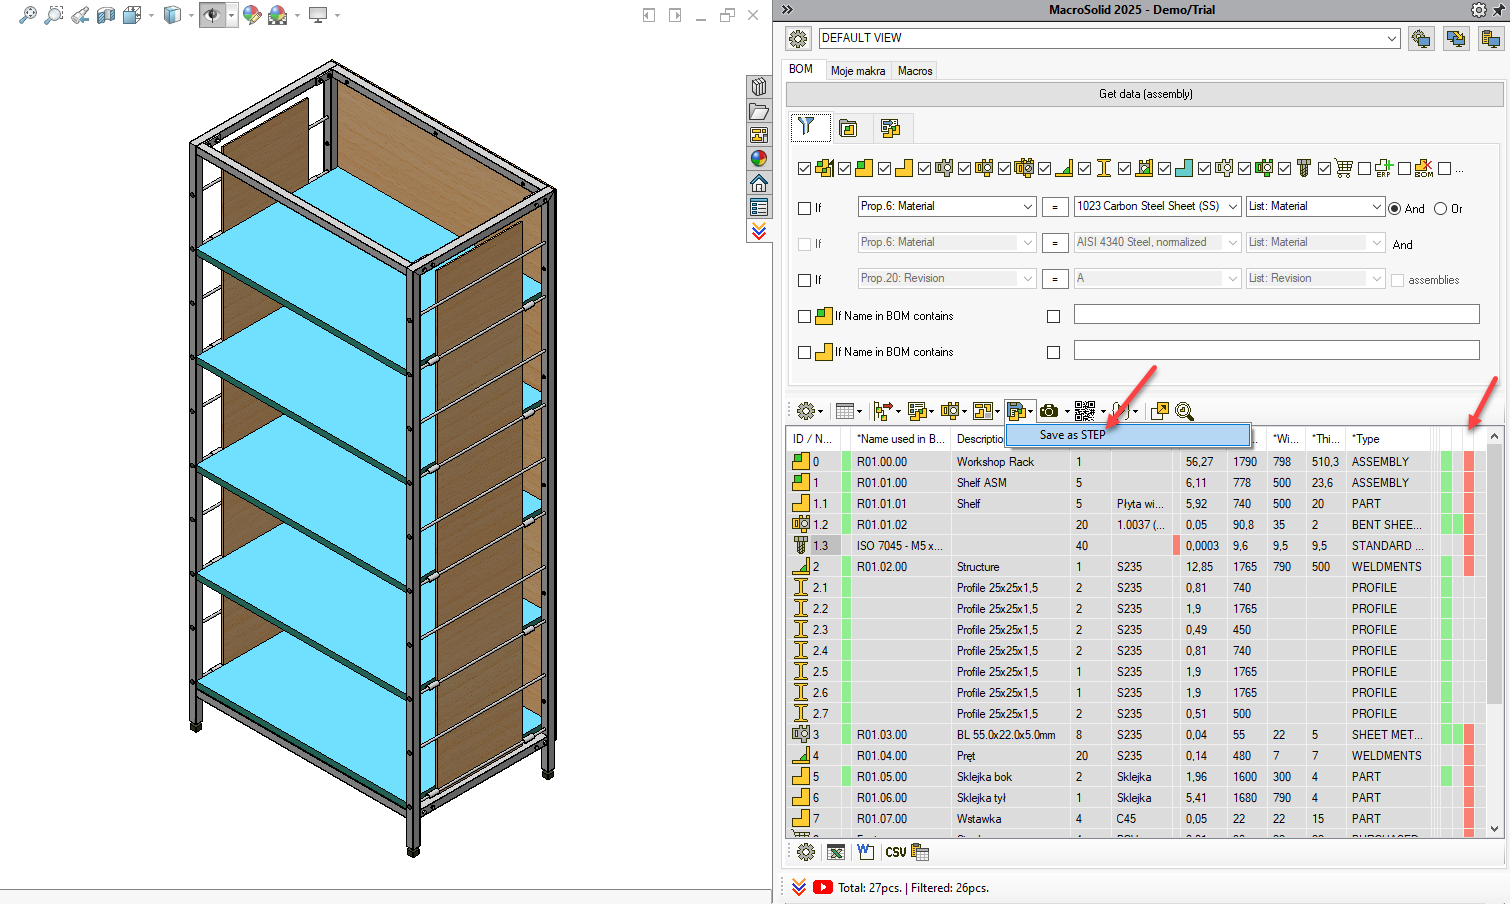
Generating STEP Files 
Same procedure – go to the SaveAs macro in the Macros tab, adjust settings, save and use from the BOM tab.
Changing Properties  –> Example 1
- Go to the QuickProperties tab.
- Fill in the constructor list in MacroSolid’s general options.
- Choose the "assign from list" function: List: DrawBy, List: CheckedBy, List: ApprovedBy.
- Assign a constructor from the list you defined.
- Run QuickProperties – PROJECT TEAM for all in the table or select components with CTRL or SHIFT and run it from the context menu (right-click).
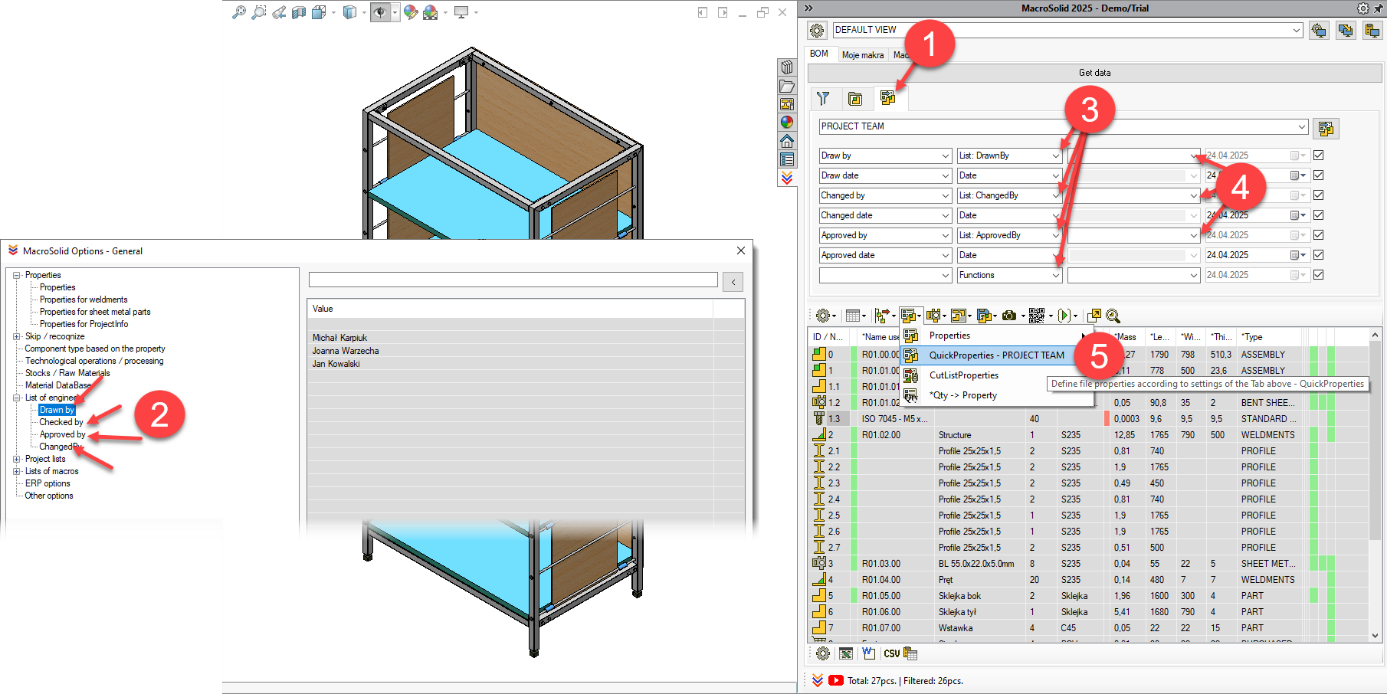
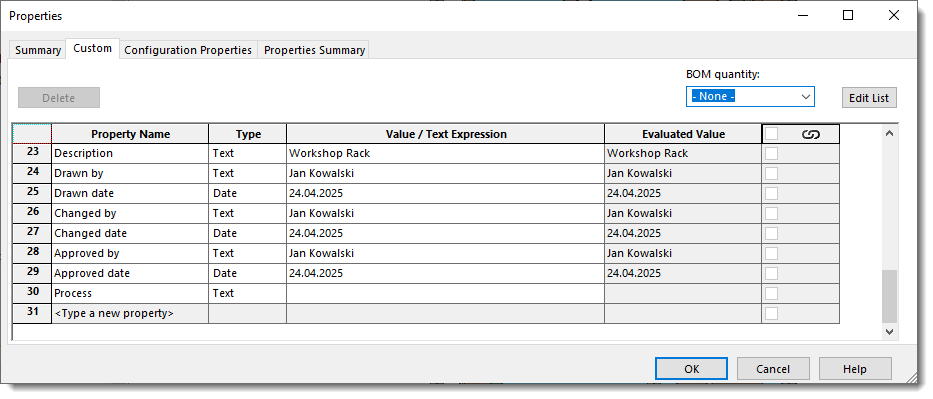
You’ve now filled in customized properties specific to your configuration.
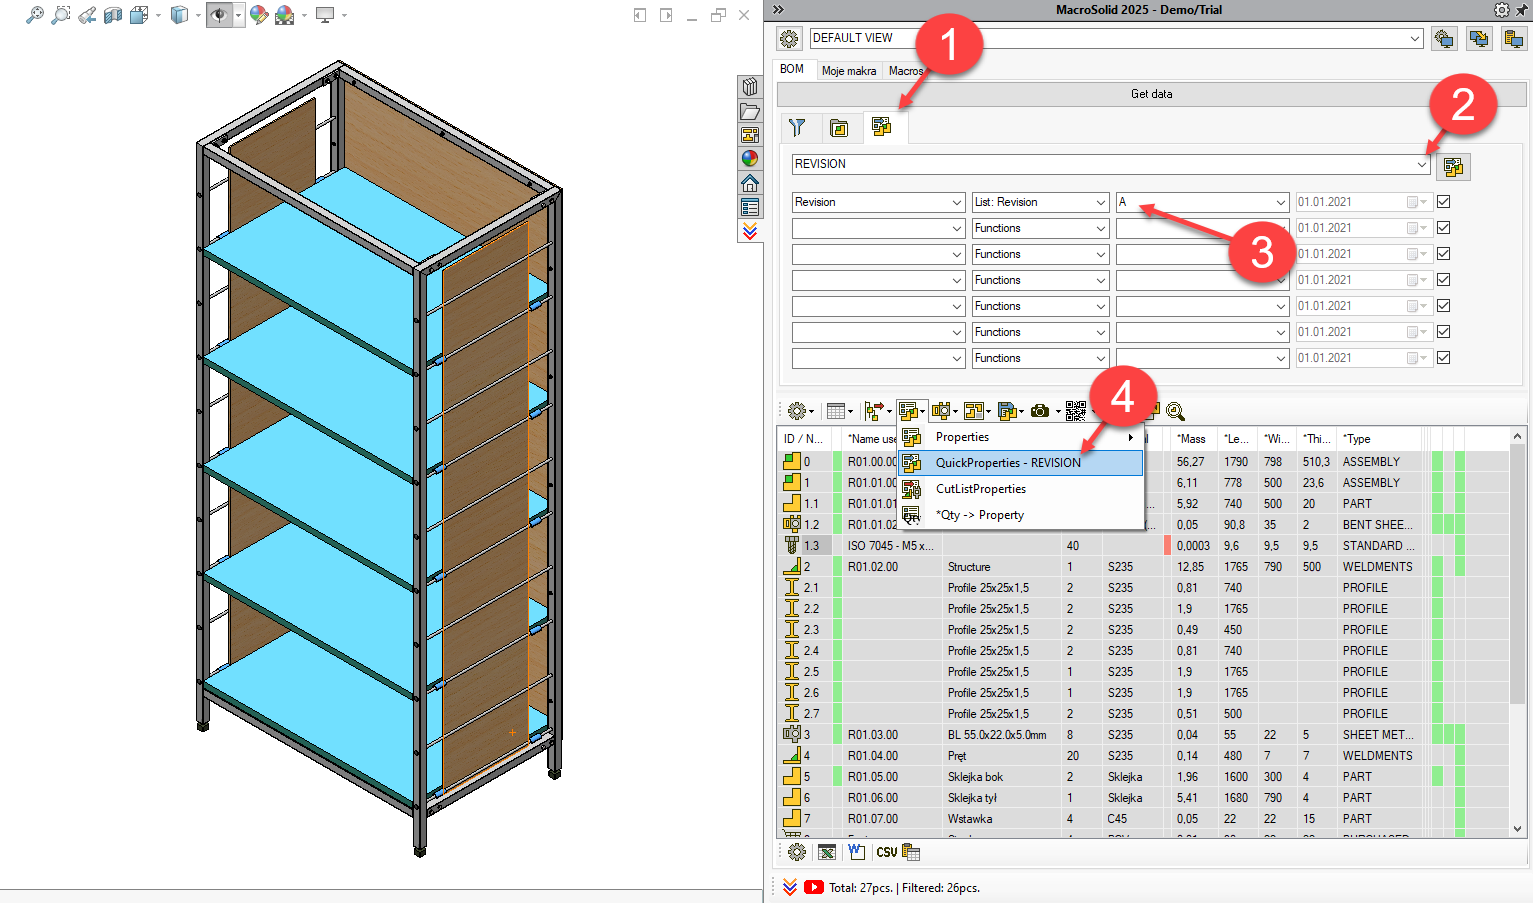
Changing Properties –> Example 2
- Go to the QuickProperties tab.
- Choose REVISION setting.
- Select value A from the list.
- Run QuickProperties – REVISION for all in the table.
You’ve just set Revision = A for all visible in the BOM Table. - Select value B.
- Select two or three rows using CTRL and right-click to run QuickProperties – REVISION from the context menu.
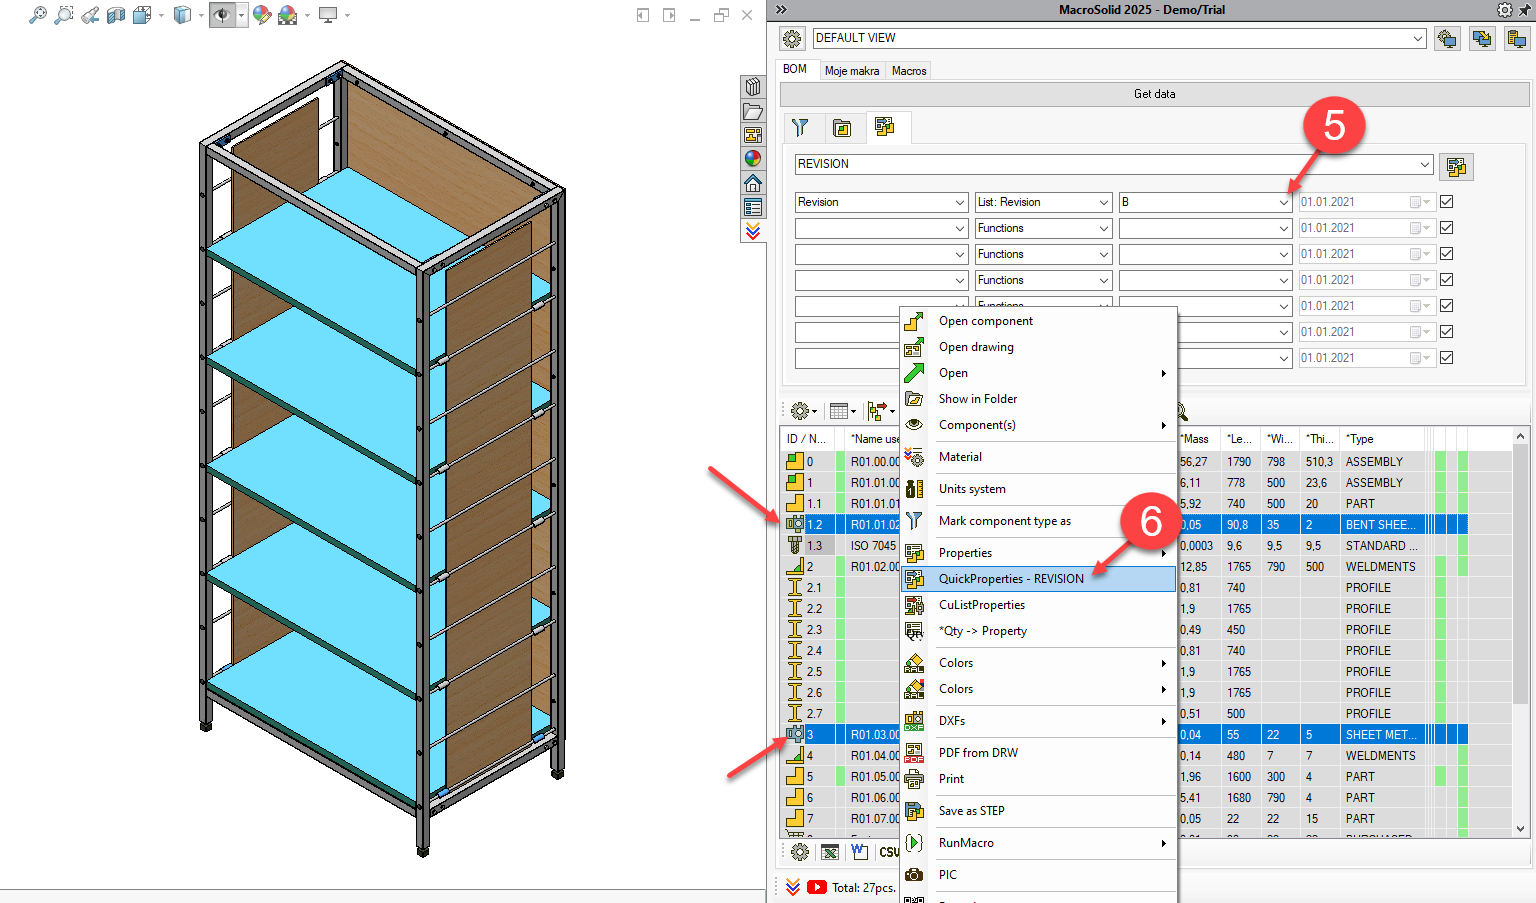
You’ve now set Revision = B for those selected rows.
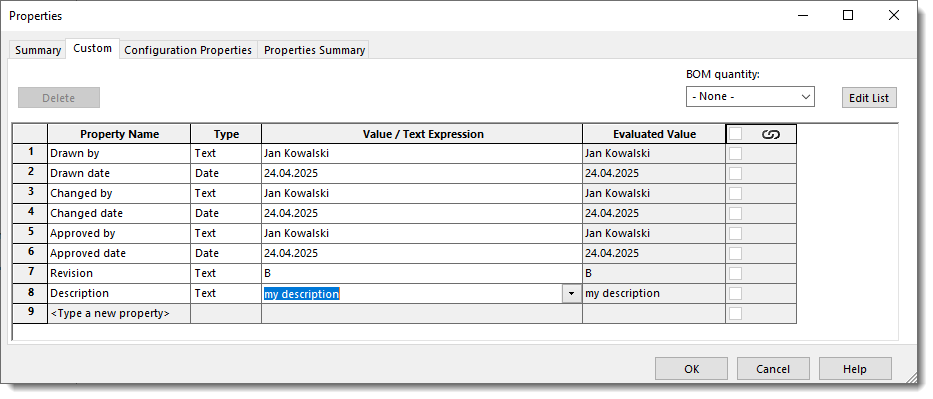
Changing Properties –> Example 3
- Click the Description column cell with the left mouse button.
- Enter the description and click anywhere in the table. Enter key won’t work ☹
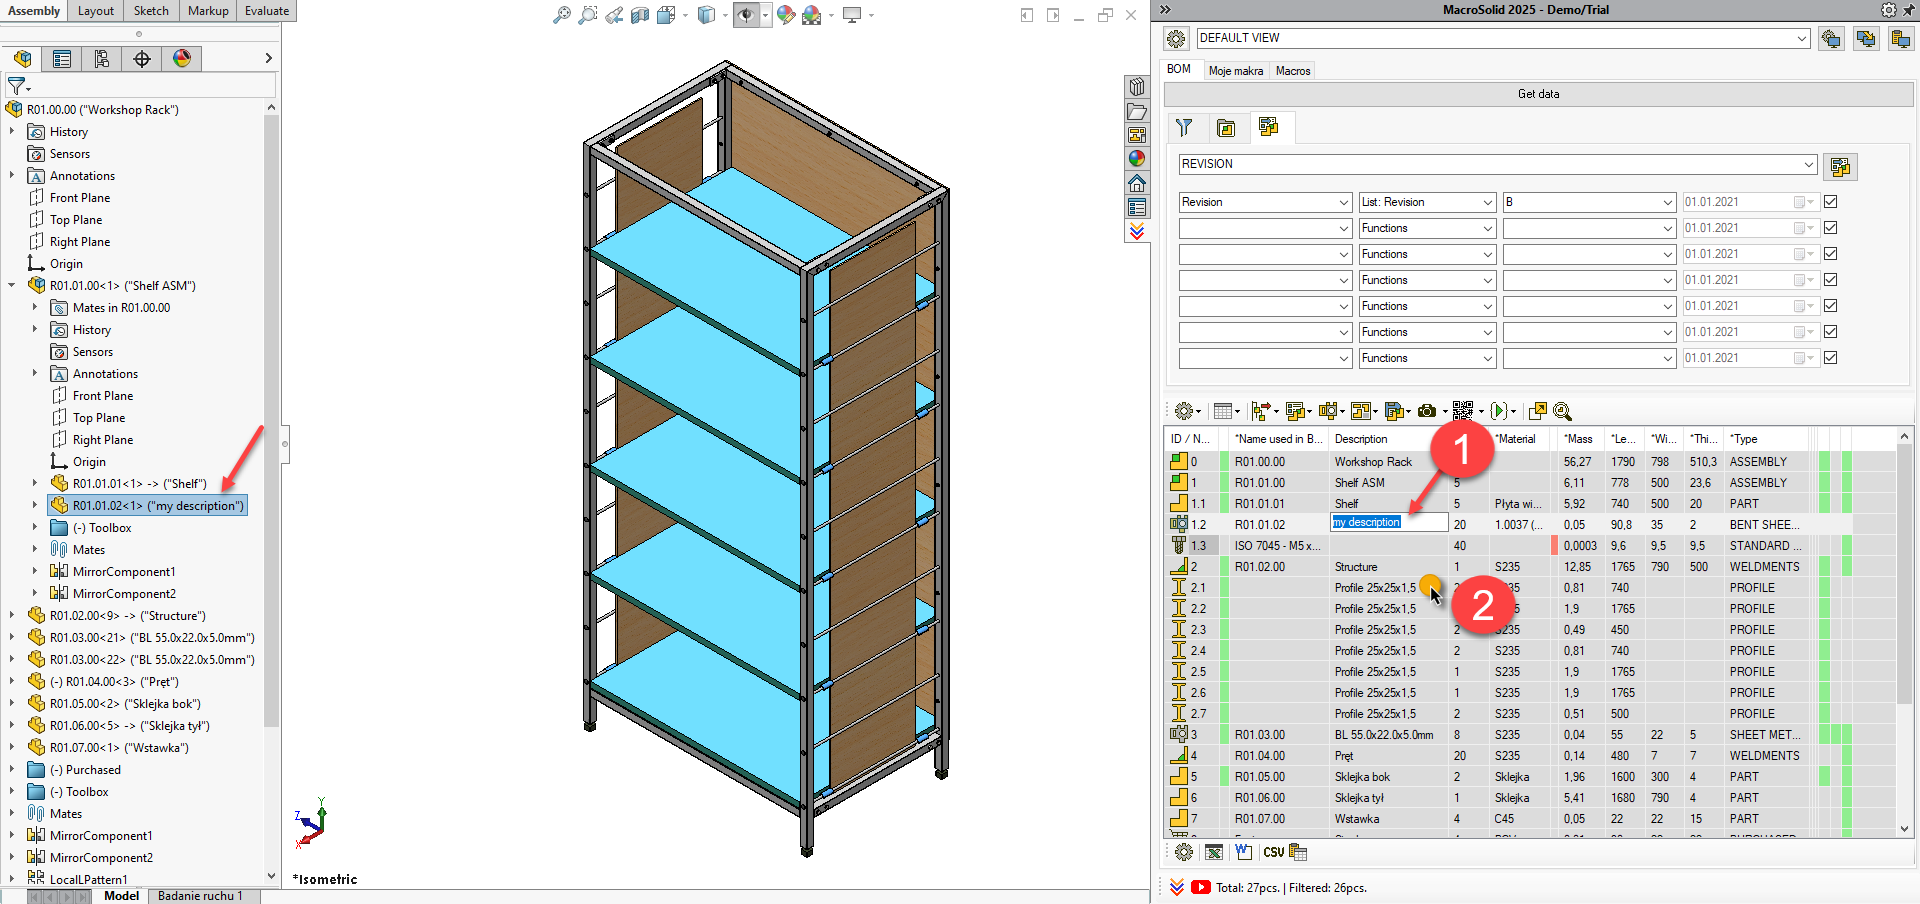
You’ve just set the Description property.
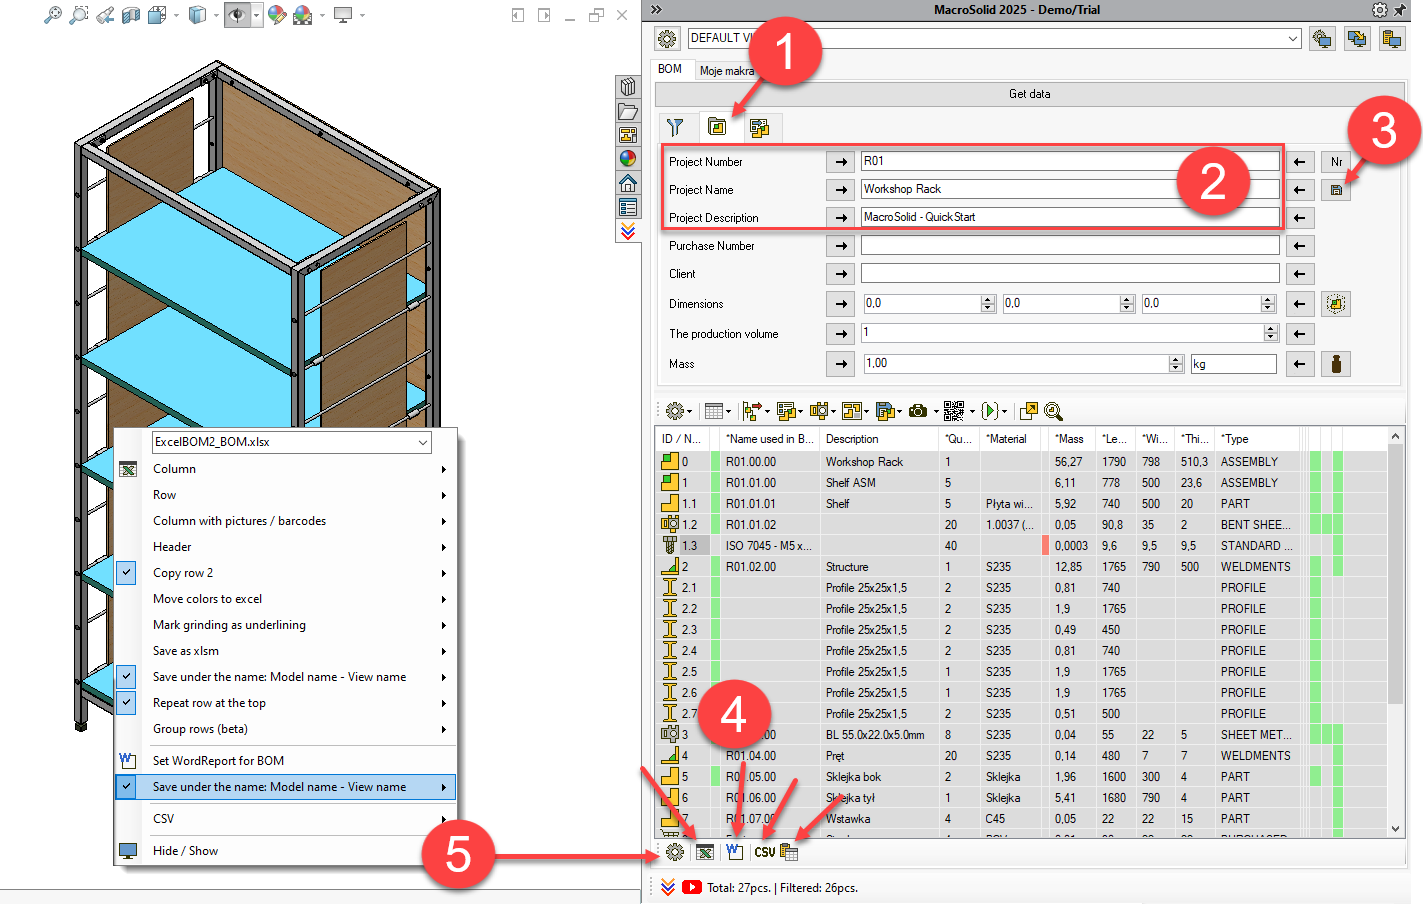
Bill of Materials, Report, Summary
To wrap up this initial MacroSolid walkthrough, generate your first BOM list to .xlsx, a report to .docx.
- Go to the ProjectInfo tab.
- Enter: Project Number, Project Name, Project Description.
- Save the data → this assigns the data to the active document’s properties.
- Export to: MS Excel (.xlsx), MS Word (.docx), CSV, or copy the BOM Table to clipboard.
- To access BOM export settings, click the gear icon.