


MacroSolid - makro Colors
The COLORS macro allows you to color parts and/or walls with a previously prepared color, defined on the list as: the name and three coordinates of the RGB color space model (R - red, G - green and B - blue). By default, the macro has been supplemented with colors from the RAL color system palette - commonly used in industry and trade.
Using the Colors macro comes down to selecting a component in the FeatureManager structure tree (1) or a wall on a 3D model and selecting an appropriate, previously prepared color (one of the macro settings). It is also possible to color from the BOM tab after selecting the selected component on the BOM list (2).
Along with defining a color on the model, it is possible to save its name and any other previously planned information to the file properties (3).
![]()
By default - the macro has been supplemented with colors from the RAL color system palette, but you can configure the settings according to your needs and, for example, mark the surface finish or protective coatings ANODIZ, NICKEL, ZINC, CHROME.
You can also define "Appearance" with the Colors macro. It is enough to connect the path to the .p2m file in the settings (C:\Program Files\SOLIDWORKS Corp\SOLIDWORKS\data\graphics\Materials)
![]()
You have 41 unique settings at your disposal. 20 settings - counting from the second - are assigned to coloring entire parts, and the next 20 to selected faces of the model. These settings are attached to the "context toolbars" after selecting a component or wall and to the MacroSolid tab in the "CommandManager".
![]()
By selecting a component and selecting options from the context toolbar, you operate the selected part, while invoking the macro from the CommandManager command bar or by starting the macro with the Run button from the window, you act on the active document - so ATTENTION!!! If the active model is an assembly, then the macro will work on all components - possibly taking into account the suppression filters built into the macro.
It is also possible to color from the BOM tab, after selecting the component in the table. In this case you have two options. The first shows the 20 most frequently used macro settings (4), while the second option gives you the option to choose any color (5). With the second option, the macro operates according to the settings saved in the first macro setting. In the color selection control, all items defined in the list from the first setting are printed.
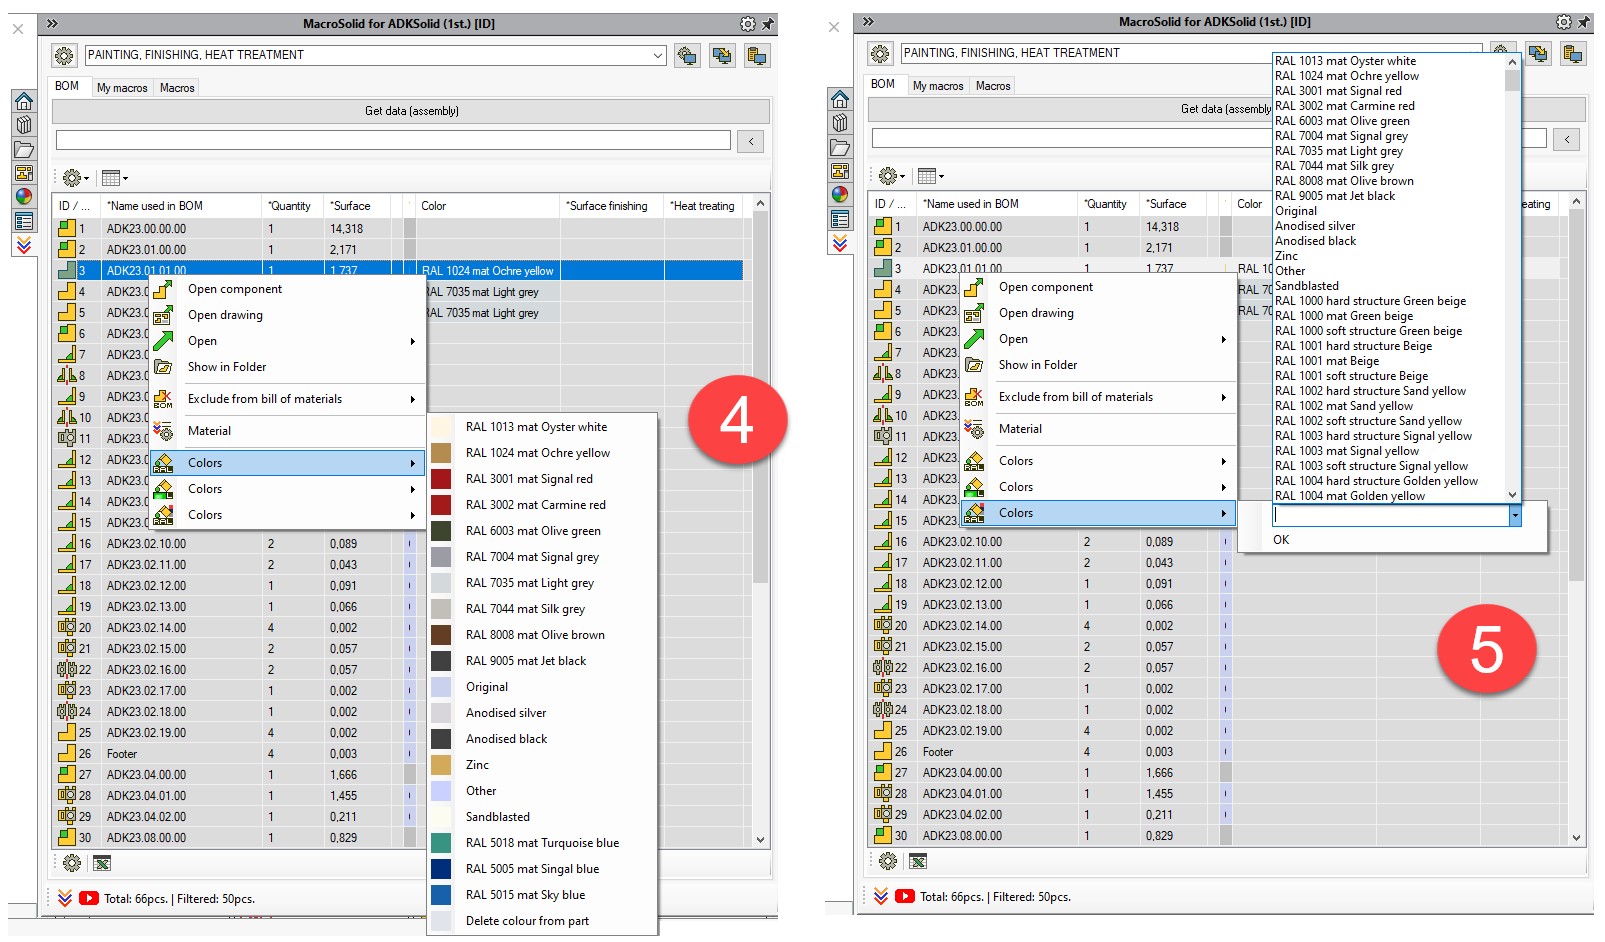
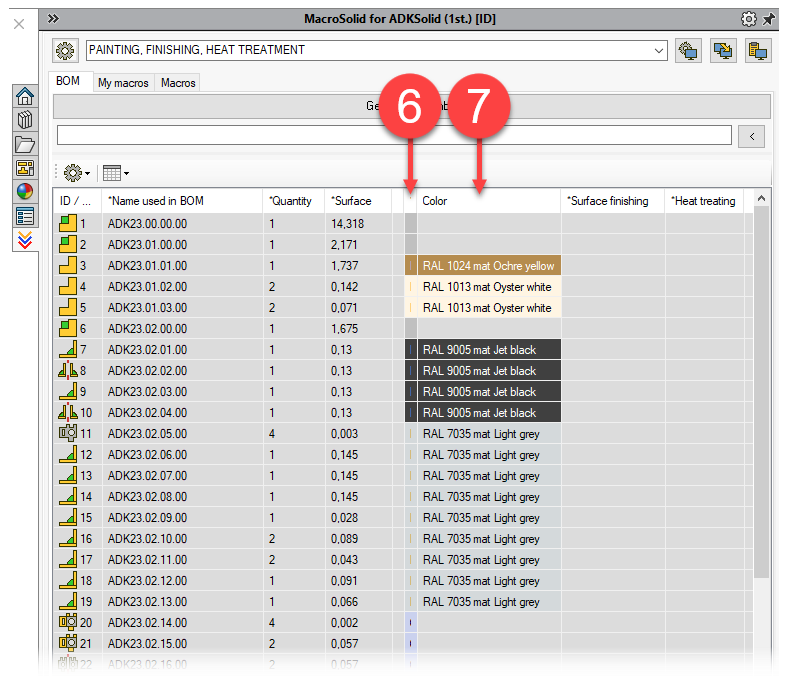
It is worth using the column *Color (6) showing the current colors on the model. The cells reflect the colors of the components, and if the RGB color components - those from the model - are on the list (of the first setting of the COLOR macro), then its name will also be written in the cell. It is also worth showing the properties that are supported by the macro (7) - so that you can have an up-to-date preview of the project status in the "PAINTING" area.
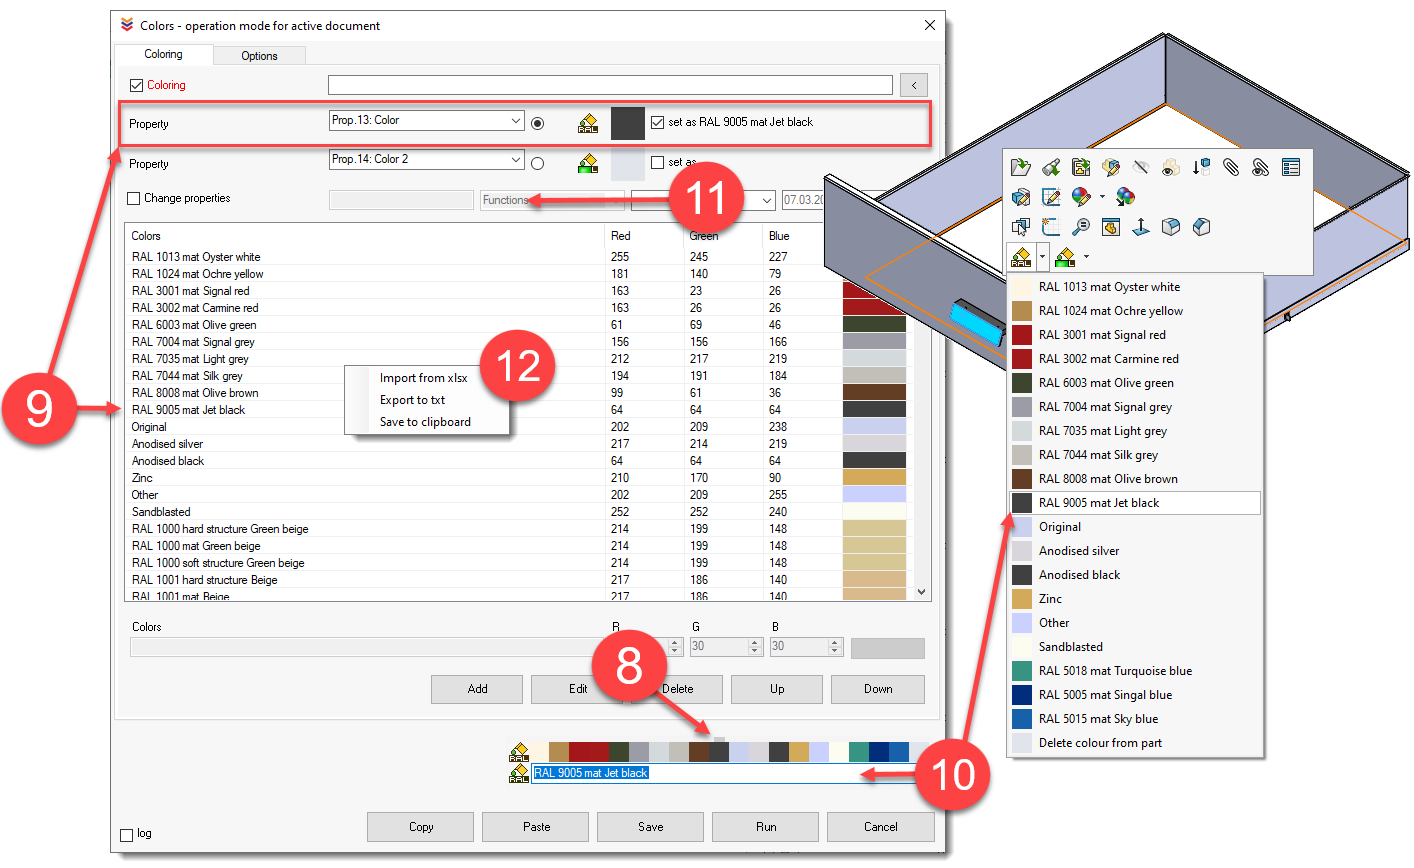
To adjust the color, select the setting you want to use (8). By selecting a row on the list (9) you define it immediately, i.e., the name will go to the properties and the RGB color will be applied to the model. So just select the appropriate row, or edit the existing one. The name of the setting is the name that will be displayed on the user interface (10).
Along with the color name, additional information can be inserted into the property, which extends the use of the COLORS macro (11).
It is recommended that each setting has the same list of colors. To facilitate the configuration of your colors, enter your palette on a special list in the Colour.xlsx file located in the Templates subfolder of the MacroSolid installation folder: C:\Program Files\MacroSolid and then use the "Import from xlsx" option (12). The file in this location has the "read-only" attribute, so save it, for example, on the desktop, modify it and replace it with the one in the MacroSolid installation location.
Copyright © ADKSolid. All rights reserved


