


MacroSolid - ExcelBOM2
ExcelBOM and ExcelBOM2 - macros allow you to export the BOM bill of materials to an MS Excel® file. ExcelBOM2 functionality has two versions independent of each other. Windowed version running on the active document and version integrated with the BOM tab. ExcelBOM is a solution that includes components placed in the FeatureManager tree folders of the assembly tree.
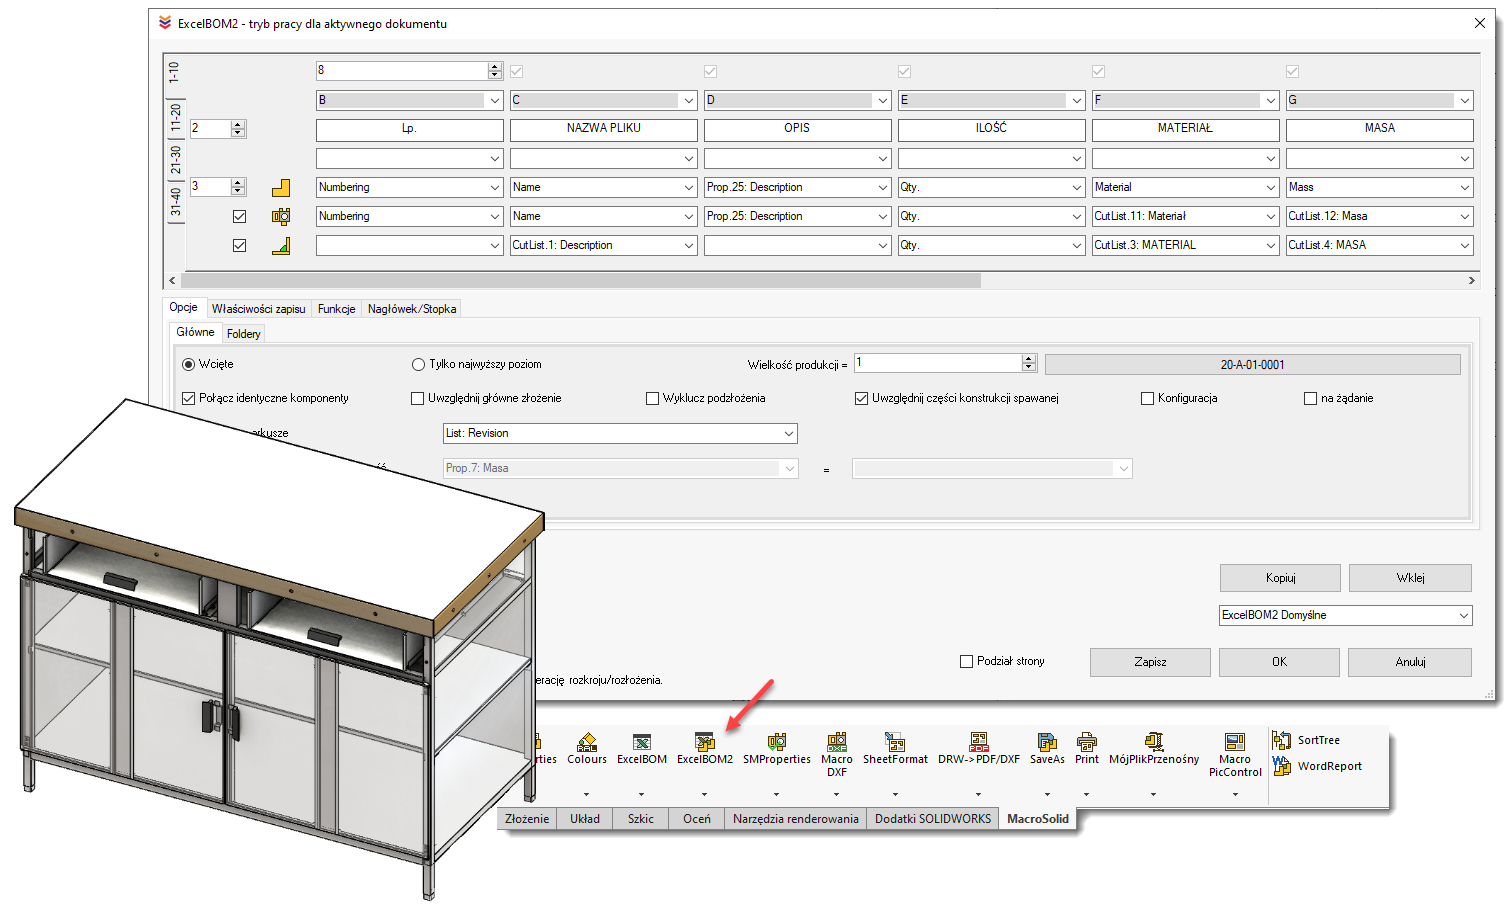
ExcelBOM2 integrated with the BOM tab transfers the entire BOM table (1) or the selected ones (2) directly to the xlsx template (3). Format the template assigned to the macro as needed, remembering to reflect the order of the columns defined in the BOM table. Select from which row and column the data should be copied (4).
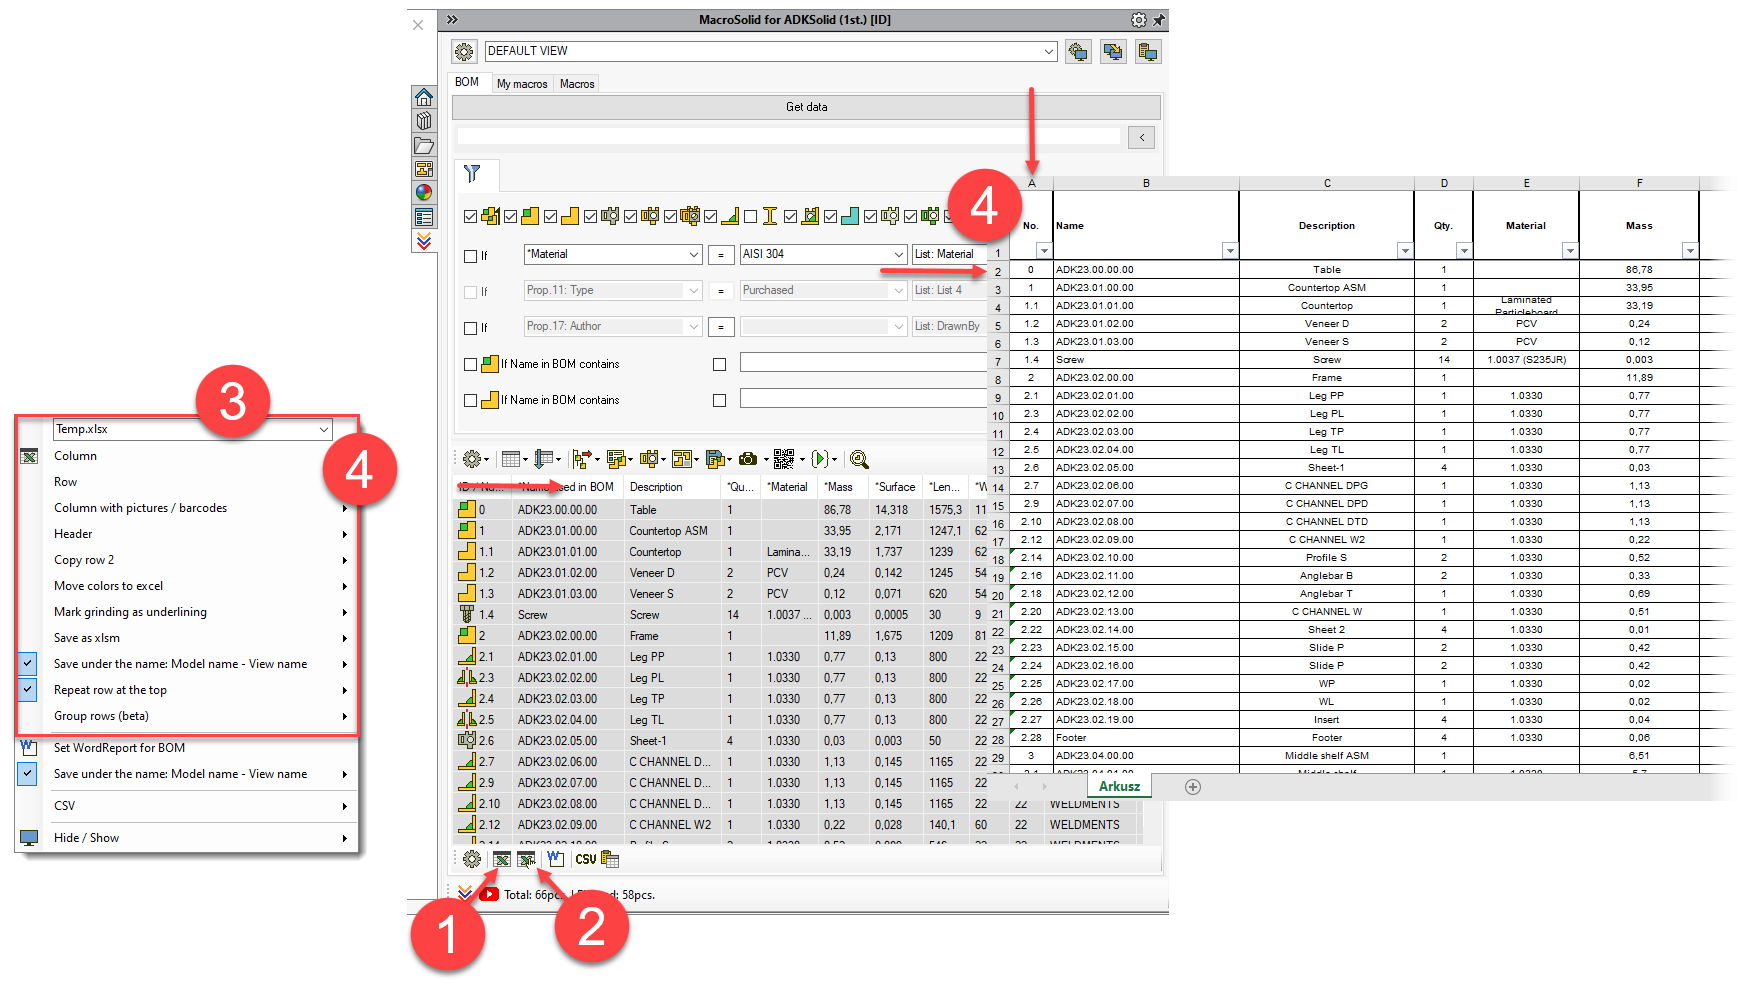
You can have as many different versions of bills of materials as there are VIEWS in MacroSolid (5). For example, after changing to a view in which only sheets will be filtered, you can use a different template, based on which the list will show the necessary data "for production". You can transfer the project information to the bill of materials header (6). Double-clicking with the left mouse button on a cell of the *Length or *Width column will mark the direction of the grind - the cell will be colored and the "Grind" property will be completed in the component properties. The macro configuration options allow you to transfer the color to Excel® or underline the text of the grind mark (7).
You choose the template from the list, which each time you expand it, it is supplemented with the names of xlsx and xlsxm files located in the "Templates" sub-folder of the MacroSolid installation location - by default it is C:\Program Files\MacroSolid\Templates. So - use the ready-made templates, modify them as you like or just put your own BOM template file here.

As a BOM template, you can use an MS Excel® file carrying built-in macros (*.xlsm) - in this case, select the "Save as xlsm" option.
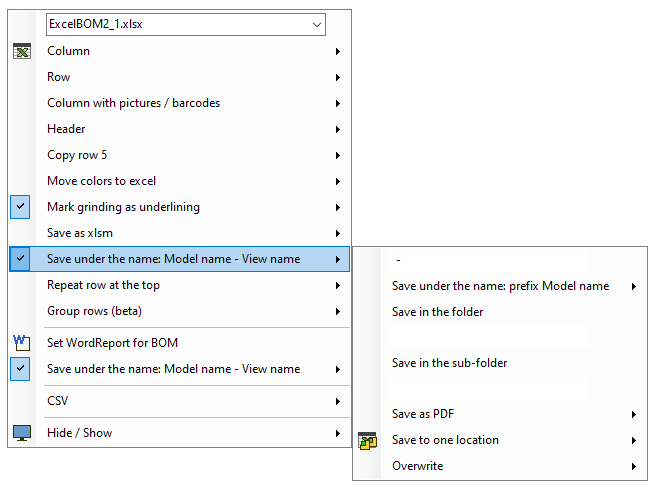
The extract / export file is saved in the same location with the same name as the name of the active model, but you can add a separator and the name of the VIEW to the name by selecting the appropriate option. Alternatively, you can save the file in a subdirectory of the model save location.
ExcelBOM2 gives you the ability to export a list of materials with photos generated with the PIC macro, or barcodes with the Barcodes macro (8). In the template, you need to predict the appropriate row height and column width.
By default, the macro completes subsequent lines, but if your bill of materials requires a footer, select the option that will copy and complete the indicated row (9). This option works well if the template itself uses formulas, functions, and calculations on cells in rows.

Format the template according to your requirements, but include a few key assumptions.
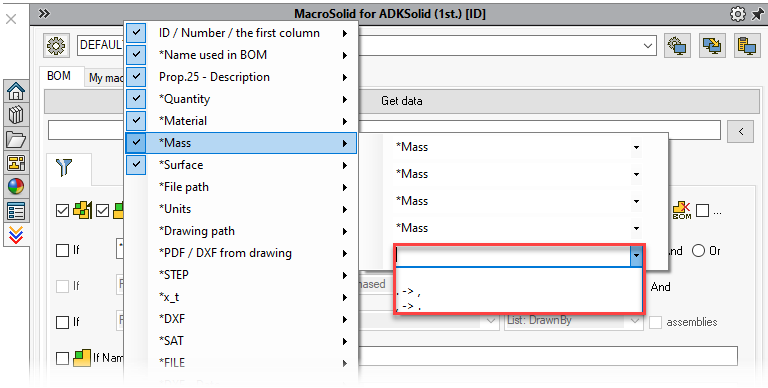
- First of all, you need to reflect the order of the columns defined in the BOM table. You have 40 columns and a lot of possibilities when it comes to what should appear in them. All columns with * are data collected, analyzed and processed by the add-in. Material, Weight, Area, but also file paths, units, image quality, dimensions. Columns without an asterisk refer to the properties of the file - they can be configured in the settings.
- If you want to omit a column from the Excel side, define an empty column in the BOM table.
- Pay particular attention to the numerical values, e.g., column *Mass, *Area. If the cells in the template are "Unspecified format", it may turn out that during completion, Excel will change the formatting and convert, for example, the date. Therefore, change the formatting of the cells to "Text", or "Numeric" if they will be summed, for example.
- You can replace a dot with a comma and vice versa at the MacroSolid settings level.
- You can also decide on rounding independently for length, mass, area and columns derived from them. This is only about information processed by MacroSolid, i.e., all columns with *.
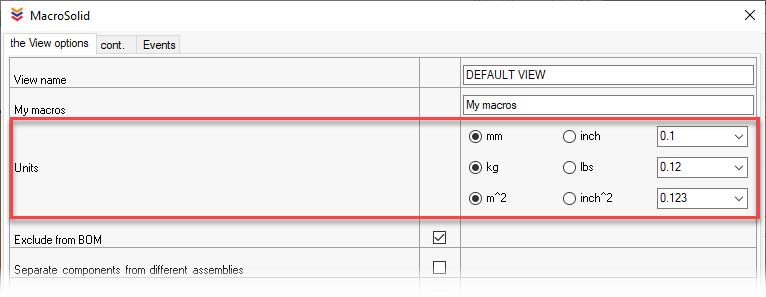
- If you have problems with the values and rounding of data retrieved from file properties, you probably have the units set incorrectly in your documents.
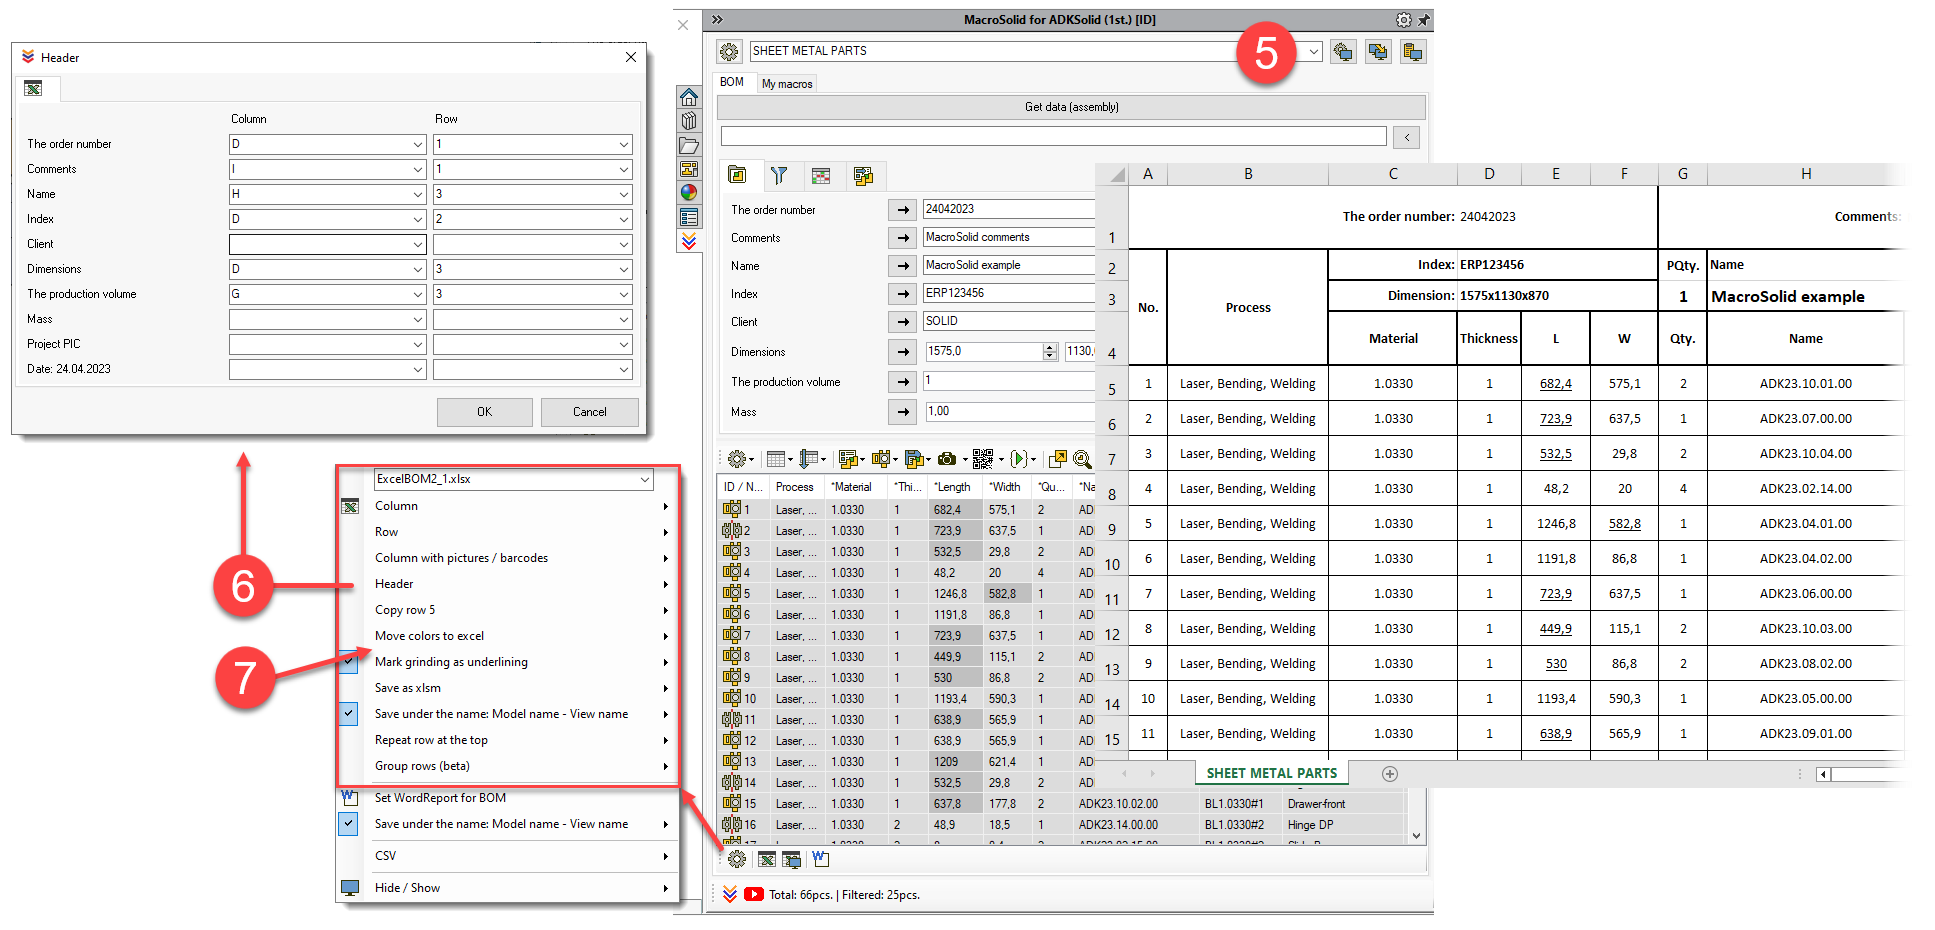
- Header is a window where you define options for transferring information from the ProjectInfo tab to the header in Excel. This is where you enter the main information about the project, save and download e.g. order number, comments, dimensions, production volume. All you need to do is configure the BOM export accordingly and the information defined in this panel will be copied to the BOM.
- Option to duplicate the start line. With the "Copy row ..." option unchecked, the macro completes subsequent rows, but if your bill of materials requires a footer, full formatting in terms of the appearance of the whole, printout, control of formulas, functions and calculations for completed cells, the "Copy row" option will be indispensable.
- The next two options are related to transferring the BOM table formatting to the template. The options were created to mark the grind of stainless-steel sheets. Double-clicking with the left mouse button on a cell of the *Length or *Width column marks the direction of the grind - the cell will be colored and the "Grind" property will be completed in the component properties. Macro configuration options allow you to transfer the color to Excel® or underline the text of the grind mark.
- The color transfer option will work well with lists intended for paint shops. The combination of the possibility of coloring with the Color macro and the BOM table and template configured for painting gives the expected results.
- If you use a template containing built-in macros, i.e., a file with the xlsxm extension - select the "Save as xlsxm" option.
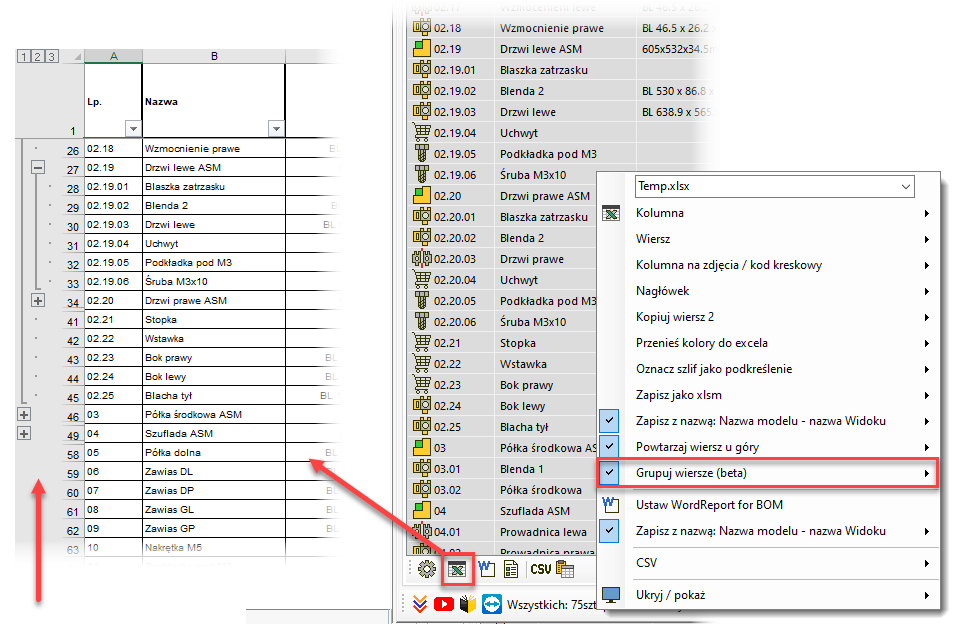
- The "Repeat top raw" option is required if you want to see the header on every printed page.
- The "Group rows" option transfers the nesting structure of the assembly tree to the xlsx file.
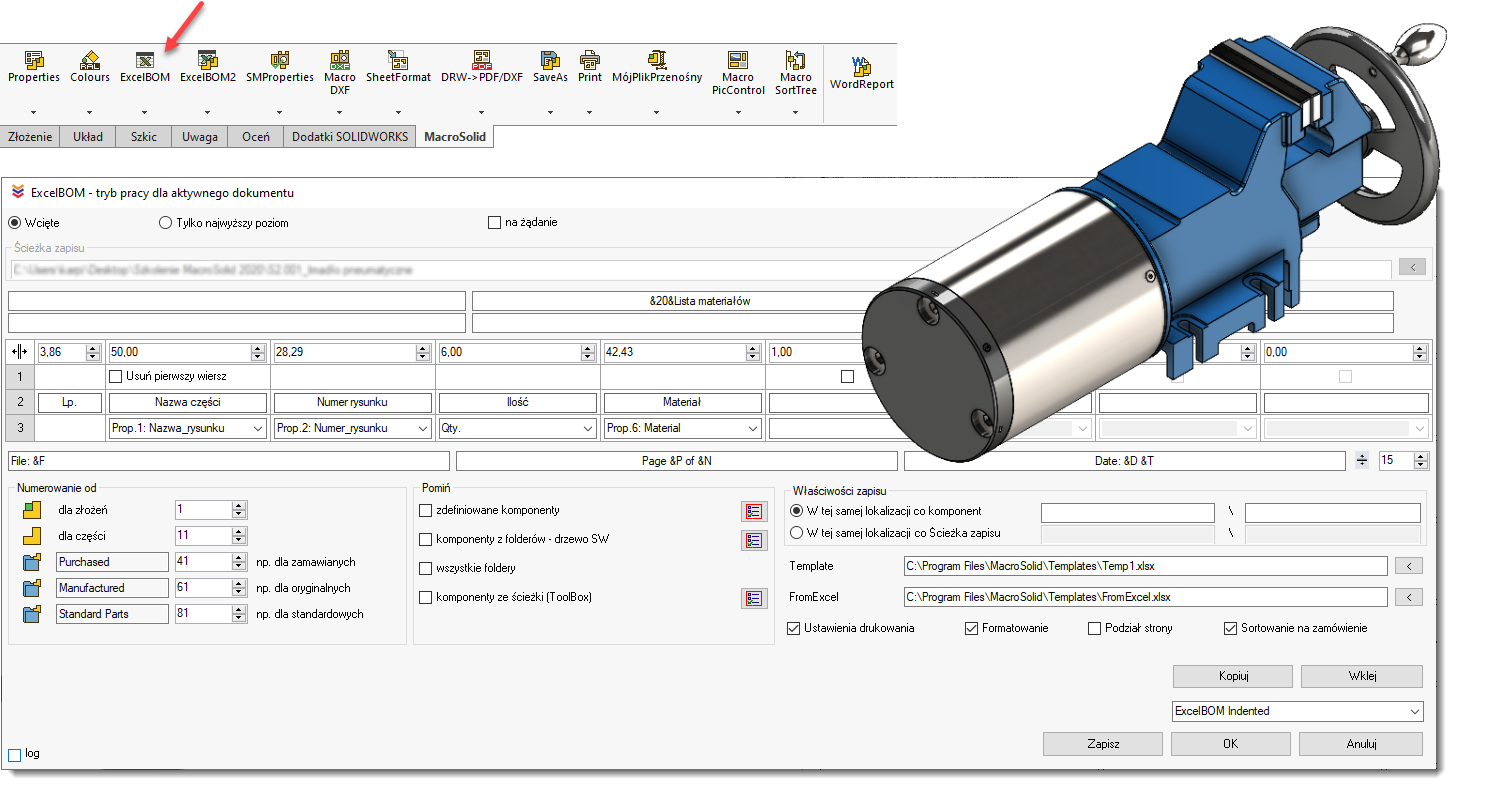
ExcelBOM2 in the window version, i.e., launched immediately on the active model, has a number of specific functionalities, tailored to the individual needs of the customer. Its functionalities are similar to the BOM tab, but all options for filtering, summing up, and defining data for component types are defined in the macro window. The windowed ExcelBOM2 supplements the previously prepared and formatted template with the values taken from the model - starting from the indicated cell. In the macro window, we can use a number of facilities, including: assigning values to various columns, using extract filters, separating components into sheets, dividing the structure of sub-assemblies into columns, auto-complete the header and footer or placing images of components in the BOM. ExcelBOM2 also allows you to list cut elements (sheets and profiles) with the correct counting of the number of pieces, regardless of which level of the model structure they are at.
Configure settings, name them, and then run them from the BOM tab of the CommandManager.
EXCELBOM macro - allows you to sort components by their type. Assemblies are listed first, then parts, and then those components that are in a folder with a user-defined name. For each type, an ordinal number is defined - the starting number from which the numbering in column A will be started.
The macro is equipped with the ability to: complete the header and footer, define the width of the columns and the height of the rows, the ability to save the file in the same location as the assembly from which the statement is generated or to a selected folder. In ExcelBOM, as in most macros from MacroSolid, the ability to apply skip filters is built in.
Copyright © ADKSolid. All rights reserved


